

Concepts App For Designing My Knitting
How to Design in Concepts
A Concepts Tutorial for iOS
Get started using Concepts' Shape Guides, Snap, Selection and Layers as you design a simple object.

The world is full of design problems to conquer, like home improvements, life-simplifying gadgets, personal style and the quest for artificial intelligence. With so many solutions to design for, Concepts offers you a cache of smart tools to customize and use as you need them, when you need them.
In this tutorial, we'll get you started using the Shape Guides, Snap, Selection and Layers as we design this simple object together.
Our design problem? A workstation needs a wire hub to gather up the snarls of computer cords — we aren't entirely wireless yet — so this little guy slides unobtrusively onto the edge of the desk, hugging the cords with it.
Mostly, though, it's a simple item to draw made of a cube, a couple circles, and a few extra lines. Let's get started.
Setting Up
1. The first step with any new project is to set up your workspace, so go ahead and open Concepts.
As designs often have several angles and iterations, tap the + button in the upper left corner of your gallery and create a new Project. You can add as many drawings to this project as you'd like.
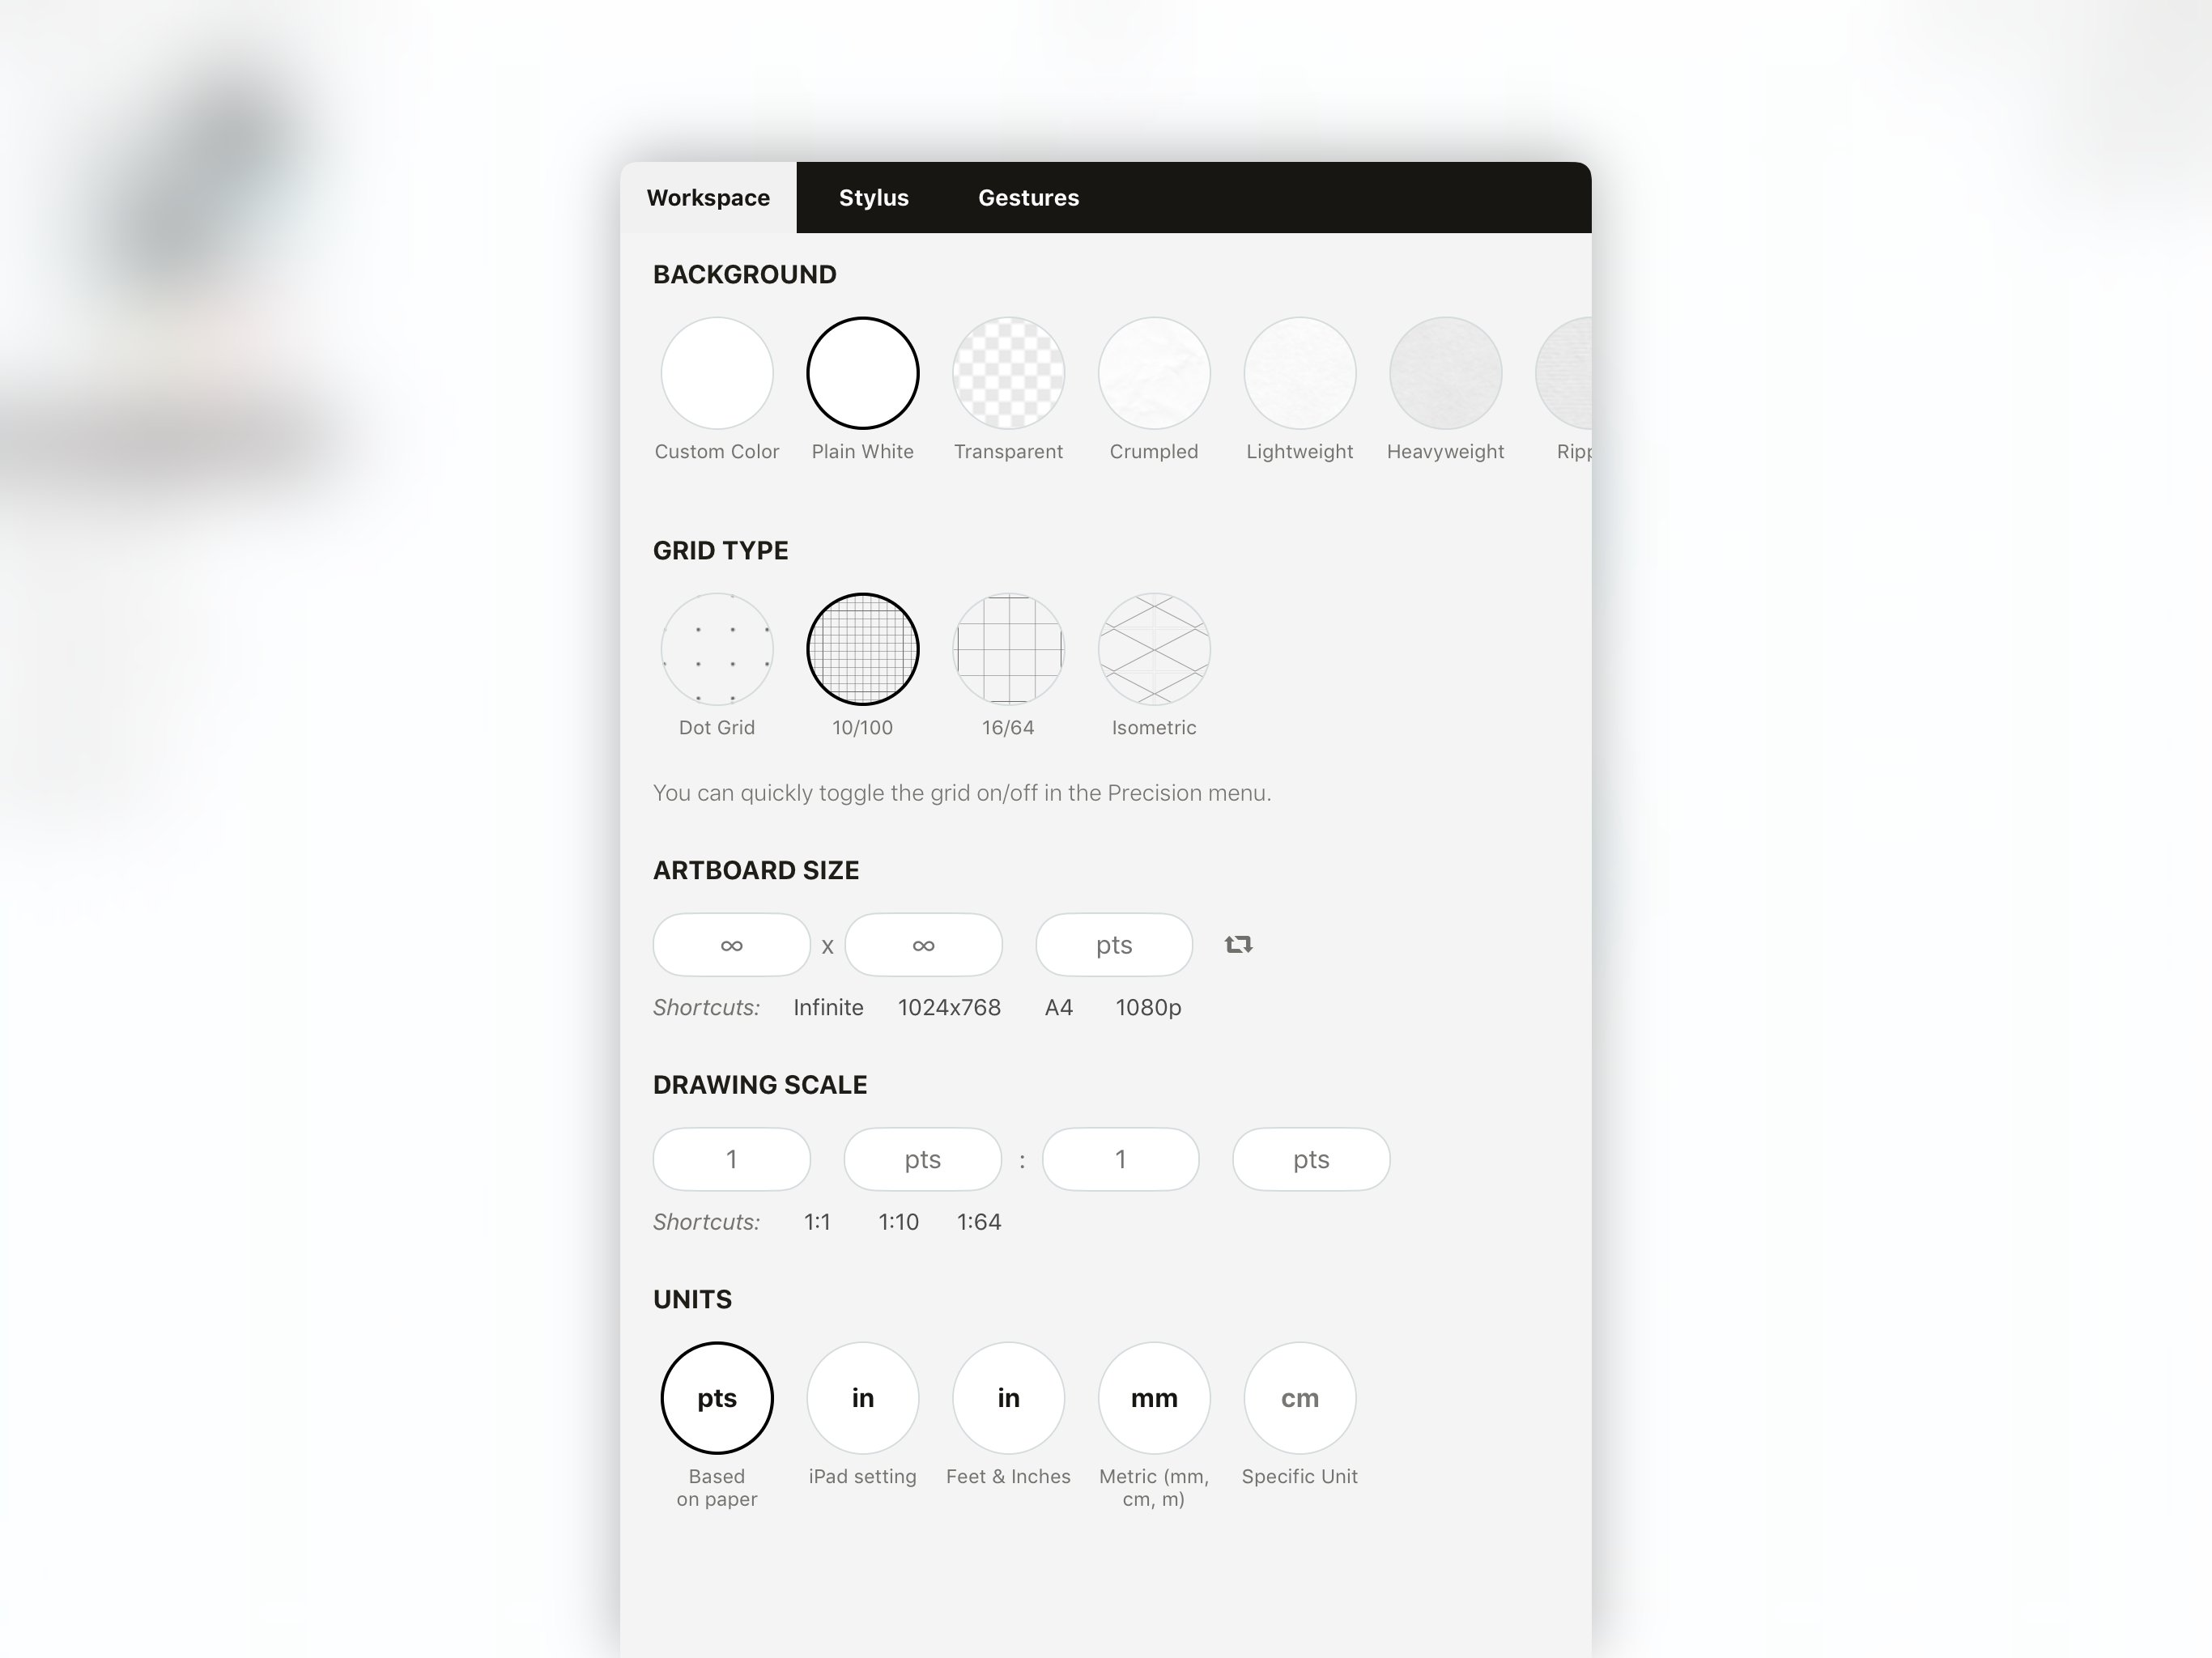
2. Open a new drawing, and tap the Settings menu aka gear icon in the upper right corner on the status bar. To make this object, you'll want to set your options like in the image below:
- Plain White paper
- Grid Type: 10/100
- Infinite Artboard
- 1:1 scale
- Units Based on Paper (pts)
3. Now let's look at the Precision menu. Tap the Precision button on canvas and you'll see options appear for Grid, Snap, Measure and Shape Guides.
Go ahead and tap the Grid active (the button beside it will become filled). This grid is an underlayment to your sketching; when you zoom in or out, the grid will zoom, too. You can choose other grid options for other projects in the Settings menu.
Now activate Snap. A few things you should know about Snap:
- Snap tells the start and end points of a stroke to reach for and touch other nearby strokes. The lines may shift as they attempt to find points to align with, but play with it and you'll get the feel of it quickly.
- Snap works with selected lines, aka lines you have drawn and selected afterward. It does not while you are drawing a line. Draw your line, then snap it into place.
Touch "Options" beside Snap and you'll see some possibilities.
- Snap to Key Points means your stroke end will locate and "snap" to significant points on the canvas.
- Snap to Grid means your stroke end will align with points on your grid.
- Autocomplete means the app will suggest snap points to nearby strokes as you sketch. You will see little gray dots appear as options to choose from. Use them if they're helpful or ignore them.
- Snap to Active Layer keeps the search for snap points inside the current layer, so you aren't shifting through multiple layers at once. Especially helpful in a complex drawing.
Activate your snap options so they look like this:

The third option in the Precision menu is Measure — this feature allows you to apply accurate scale and measurements to your drawing. Though this is a key element of design, we won't be using it in this tutorial. We have a full walkthrough on scale and measurement here.
The final option in the Precision menu activates the Shape Guides. We'll begin drawing our cube using these guides.

Drawing the Cube
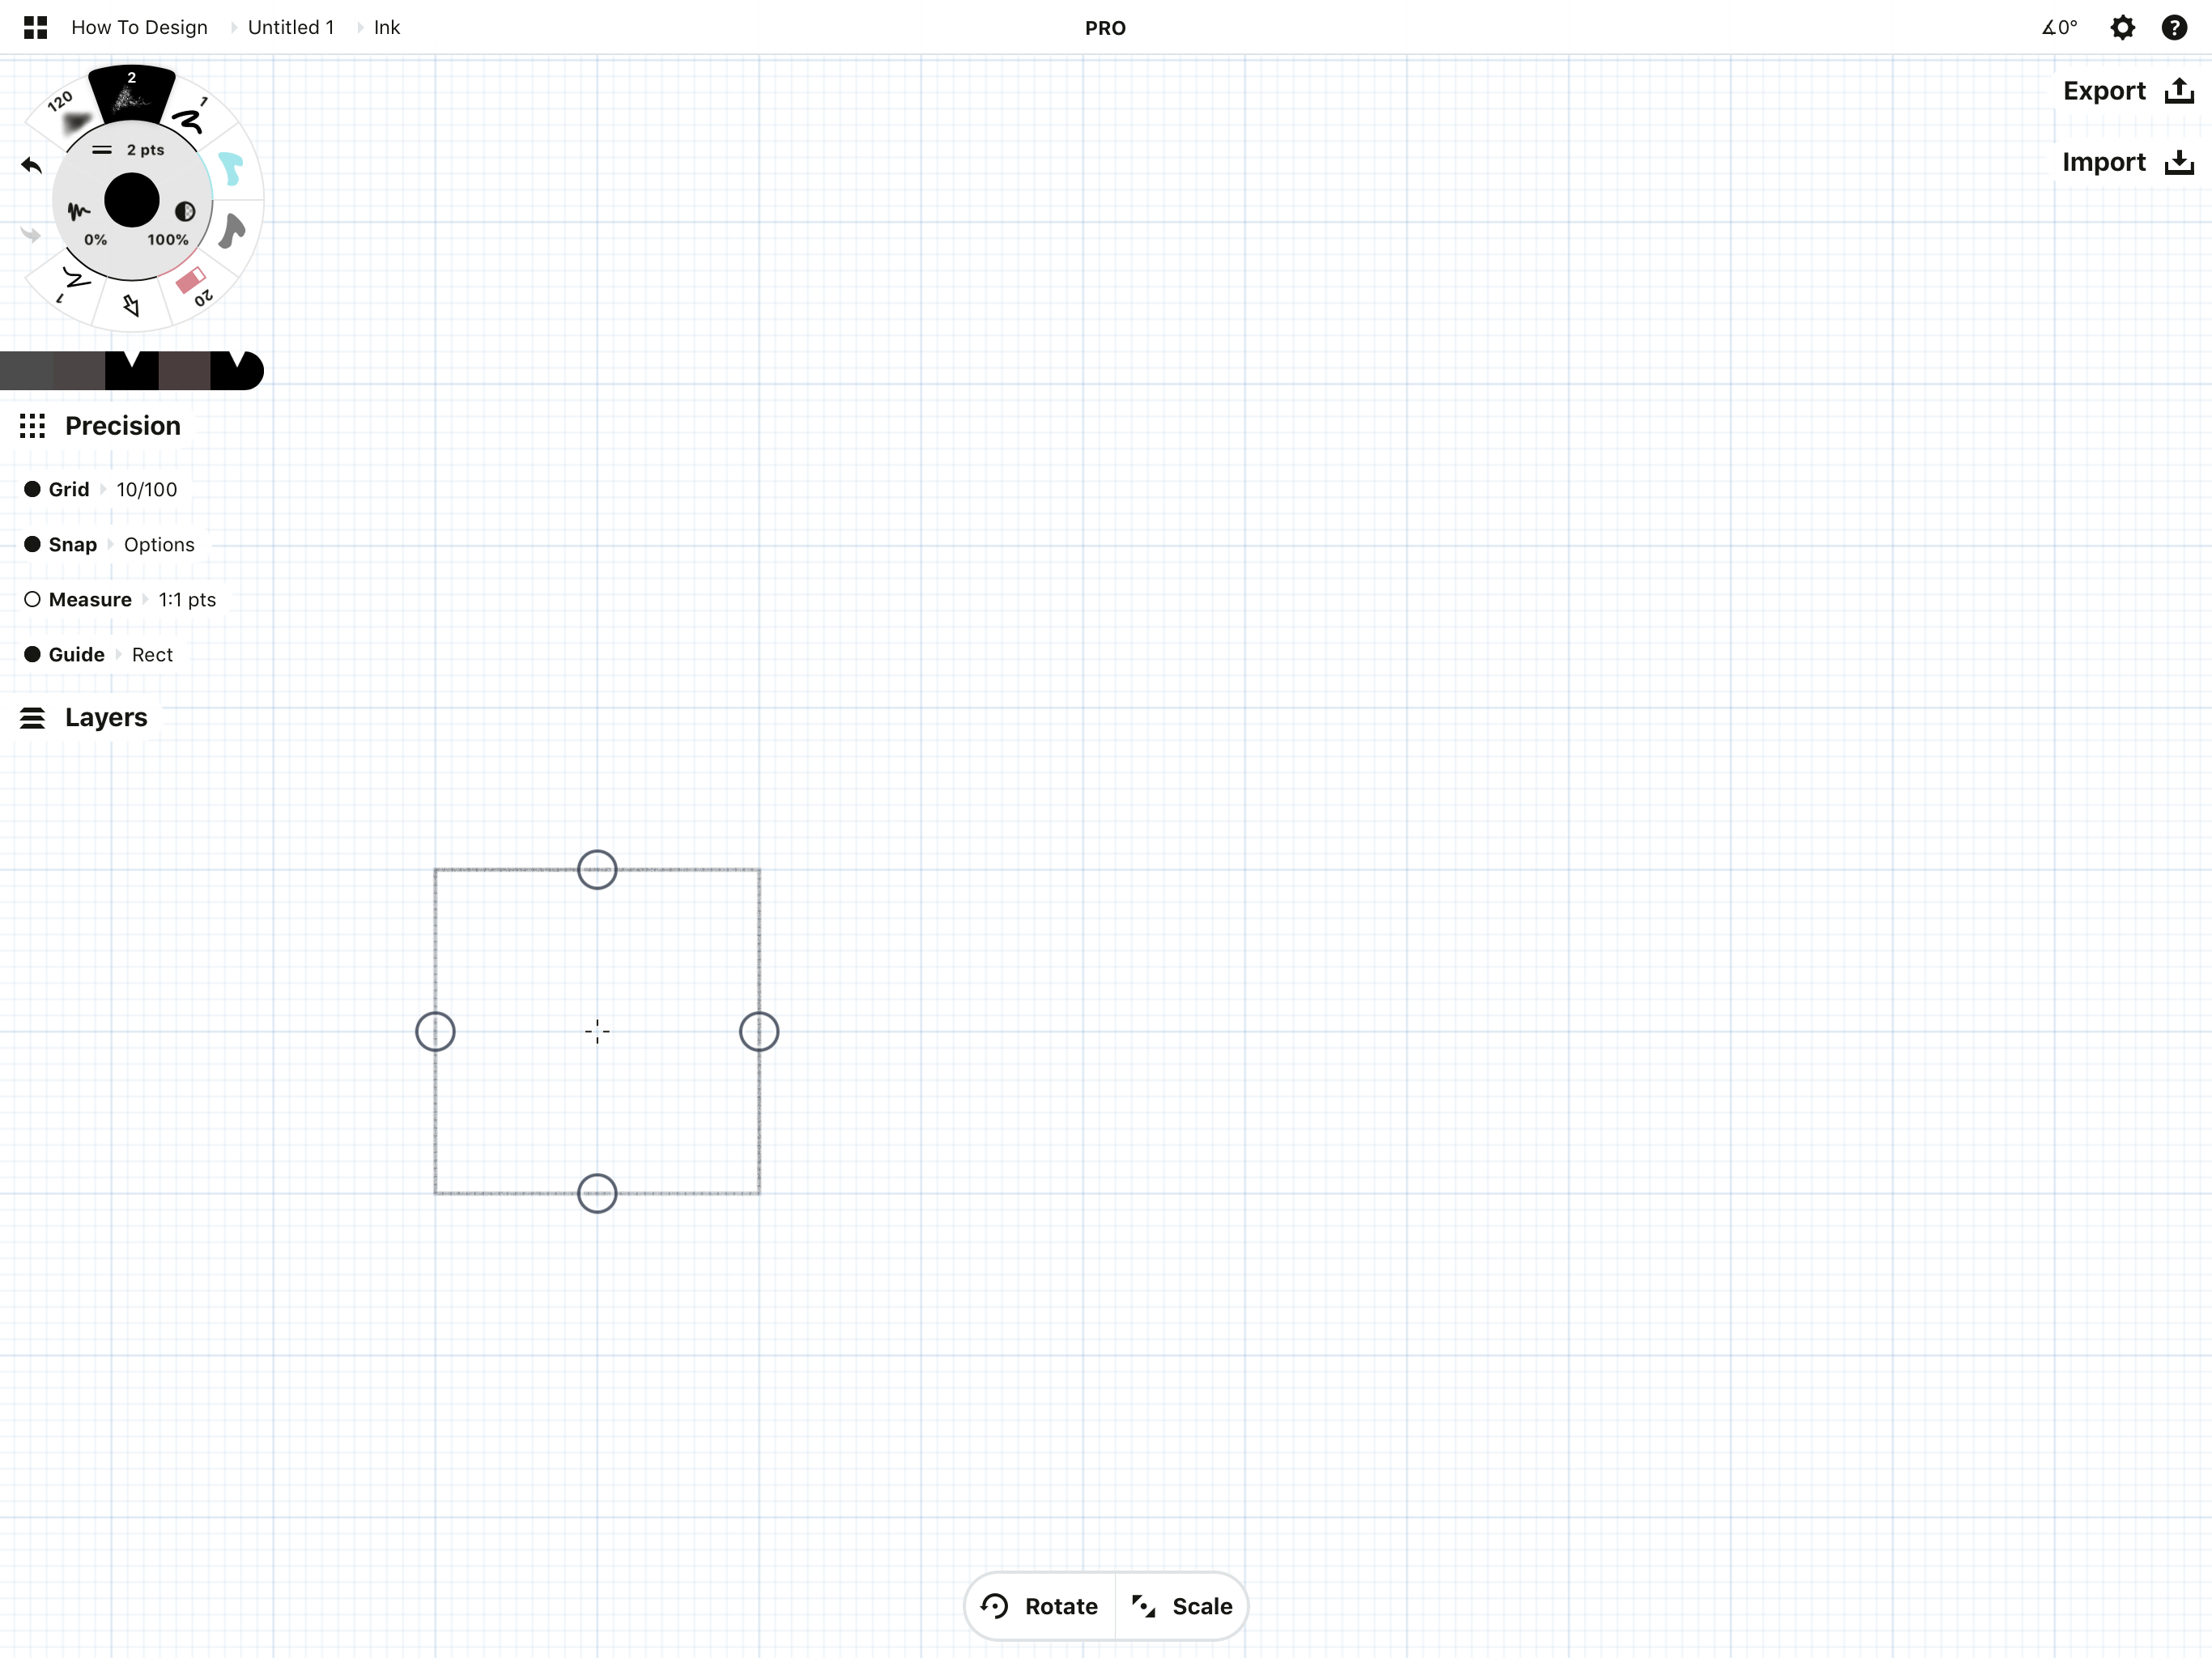
1. Tap the guide type beside the word "Guide" and find the Rectangle. Tap it to activate it.

Each of the circular handles on the perimeter of the guide can be dragged to adjust the shape. Expand your fingers to make it larger, pinch to make it smaller, and rotate to turn it. You can toggle rotation and scale on or off in the menu at the bottom of the screen. This lets you lock your shape guide into place if you'd like.
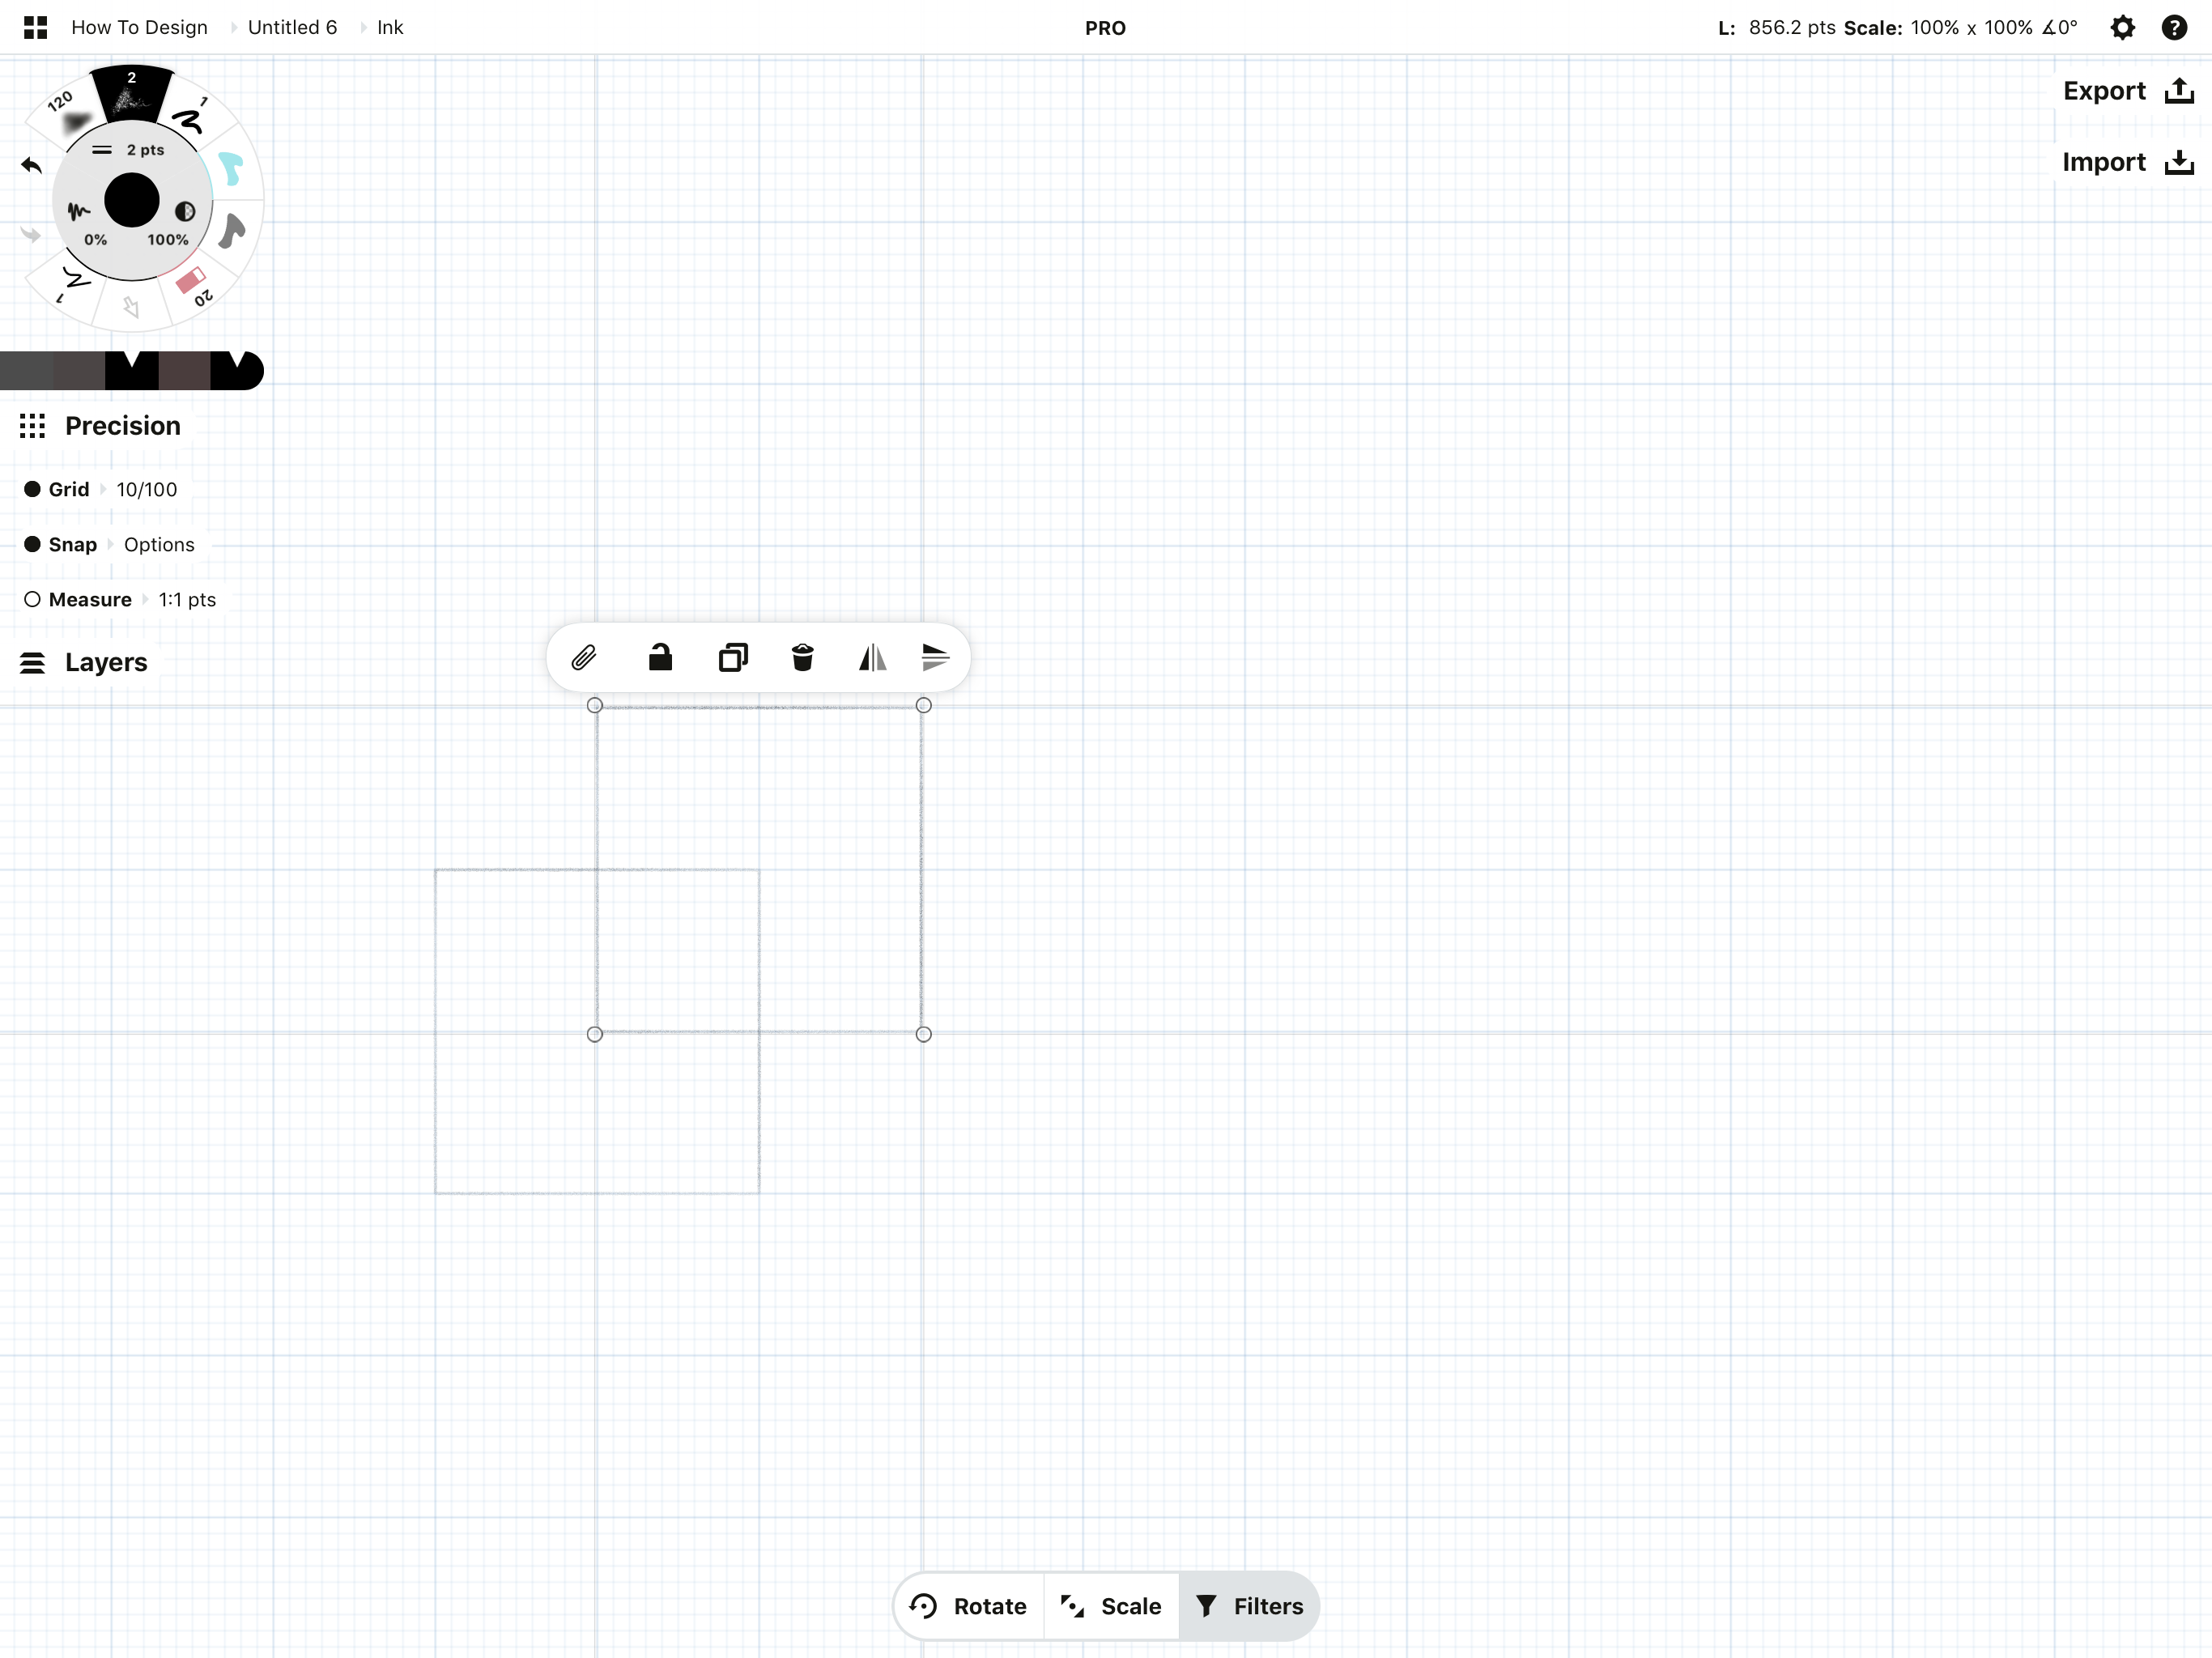
Double-tap the crosshairs in the middle of the rectangle to make it a square. (You can do this for each of the shape guides and transform them into their "perfect" alter-egos.)
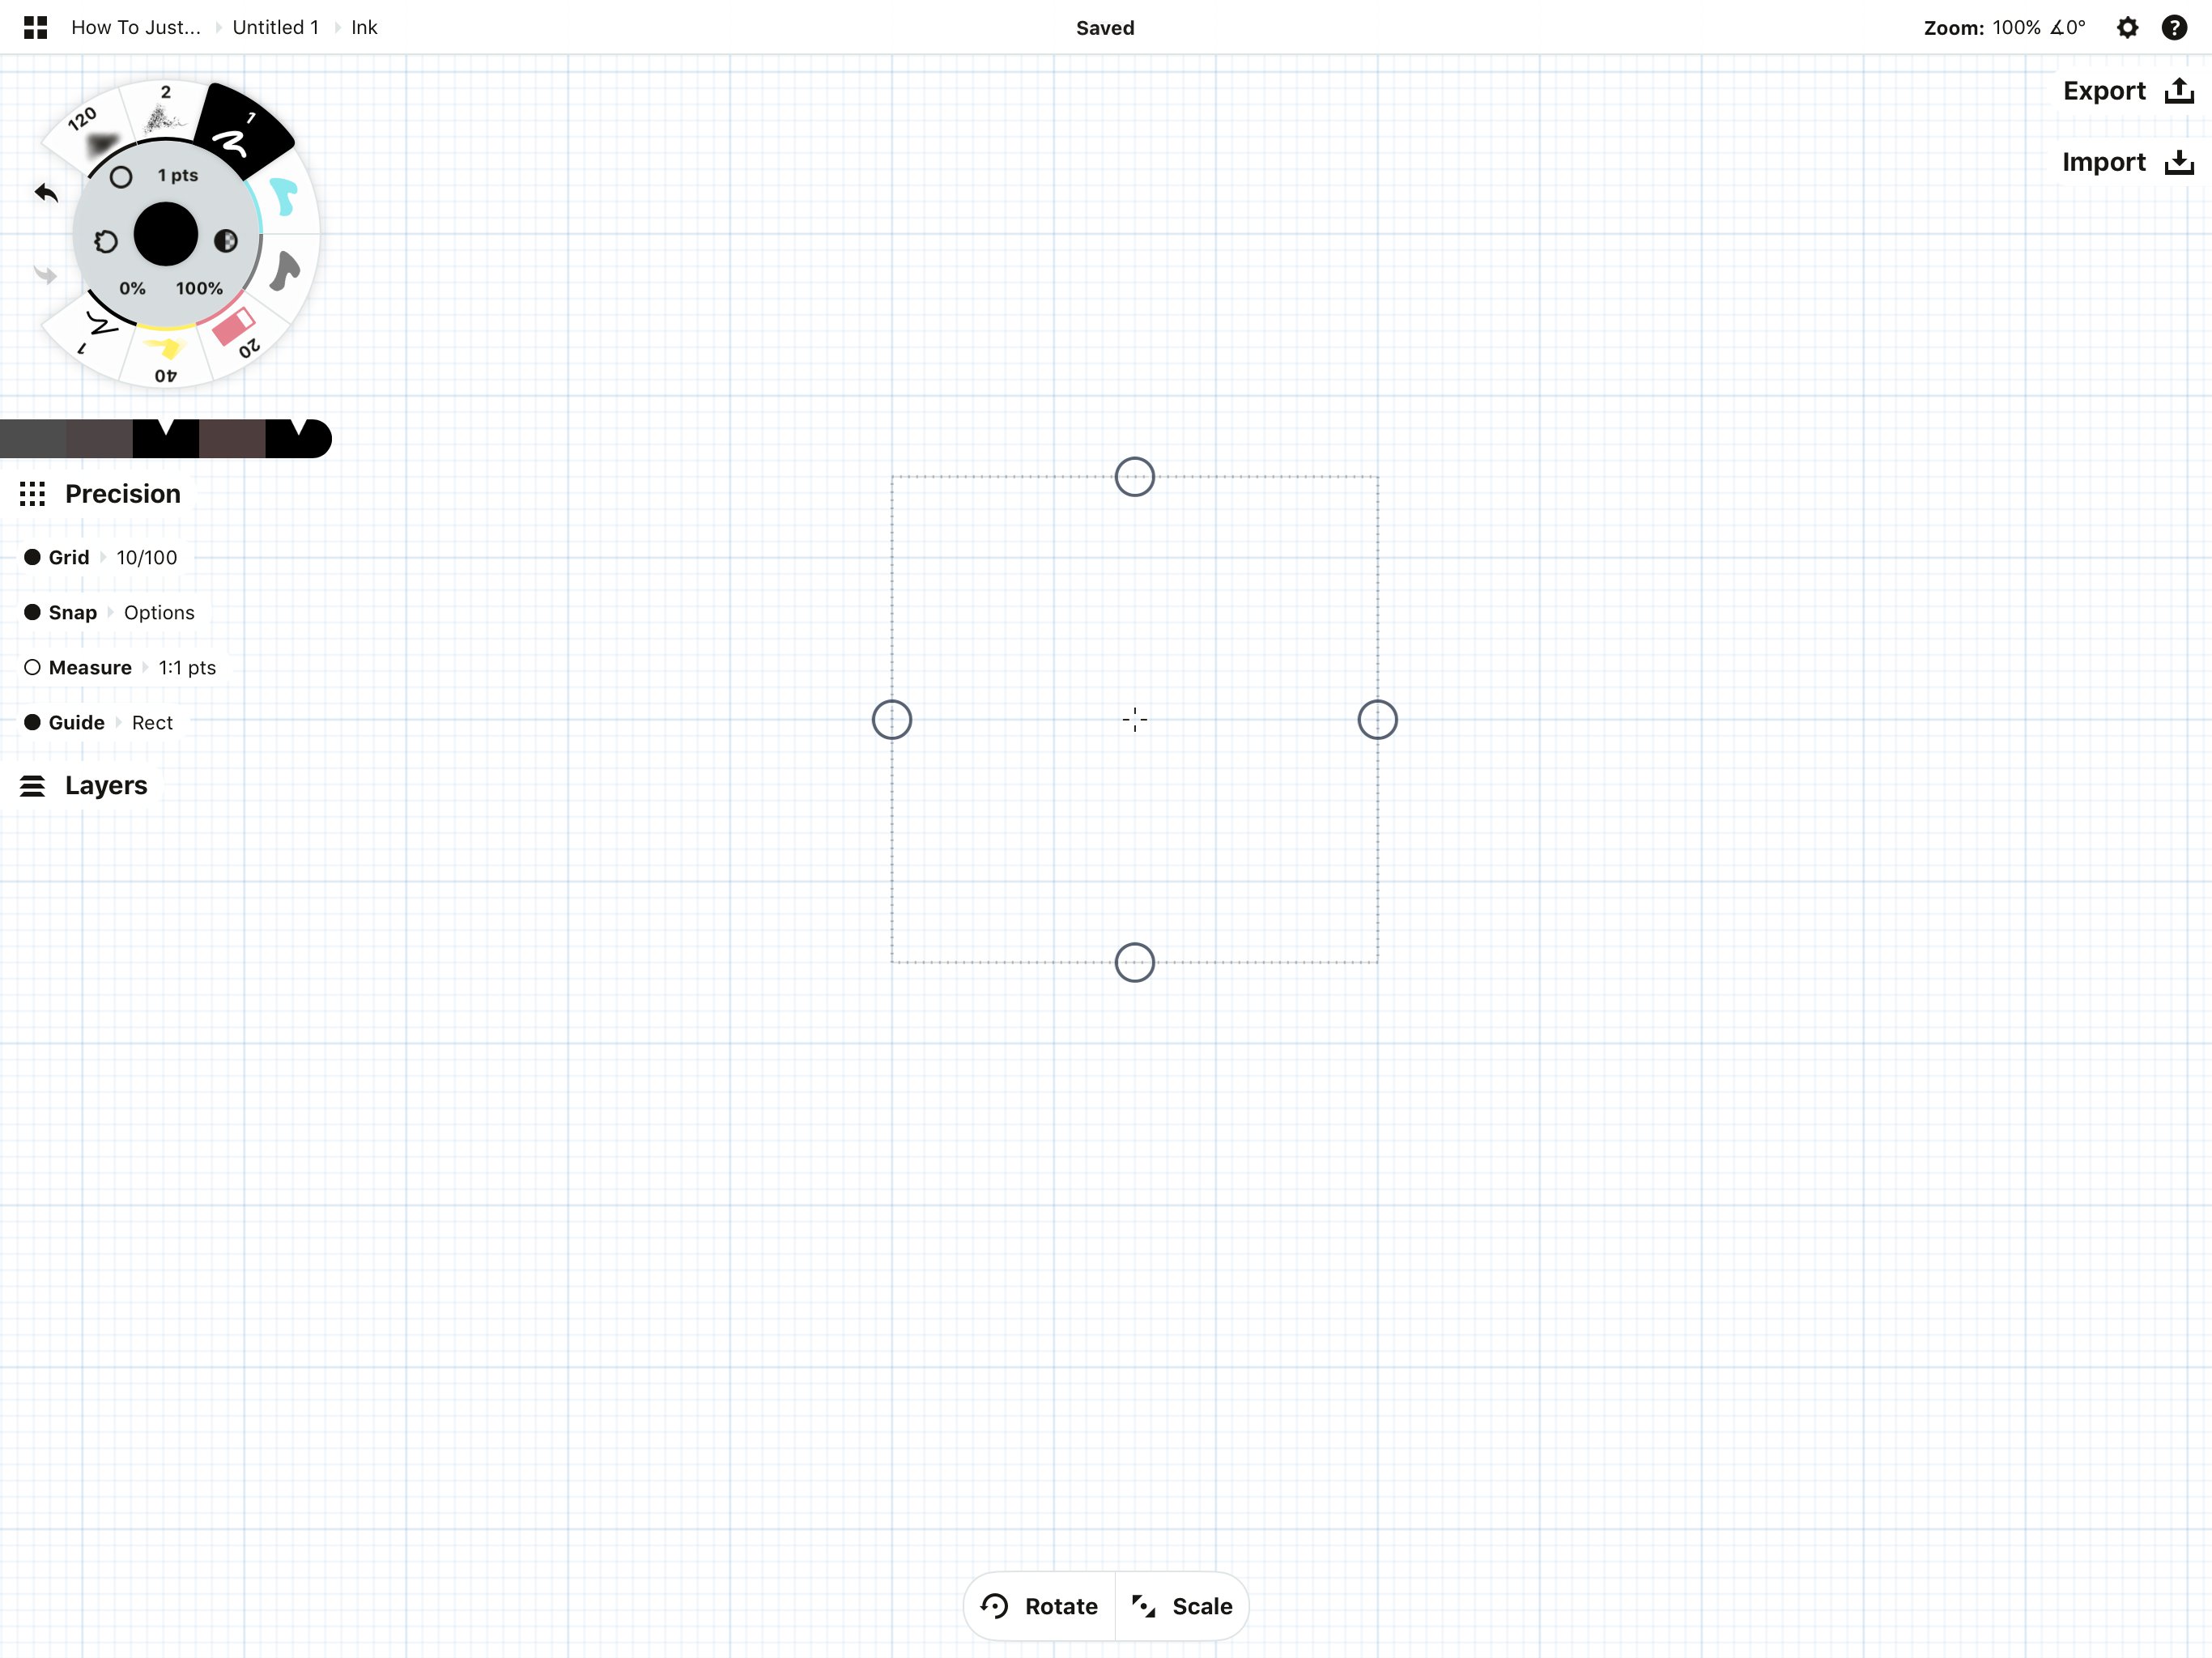
2. Now use two fingers or drag the crosshairs to move the square to a corner on the grid. Pinch or spread your fingers to make your square the same size as four large grid squares.

Now choose a pencil from the tool wheel and draw the square. You can draw anywhere on screen and it will trace the guide, as the guide is the only active "canvas" when it's on.
Once you're finished drawing, deactivate the guide. You can do this by tapping on the screen with a finger away from the guide, or by tapping the circle again beside Guide in the Precision menu.

3. To make the square into a cube, we'll need another square. We could pull up the guide again, move it over and draw another, but let's take a faster route and duplicate it.
First, select the square. Selection allows you to "pick up" anything you've drawn by lassoing or tapping on your strokes. There are several ways to activate selection, but the two main ones are:
1) the Selection tool (Selection is the only thing active when using this tool)
- Lasso = drag on the canvas to select one or many strokes at once
- Item Picker = tap on the canvas to select one stroke at a time (keep tapping to add more)
2) a tap+hold on the canvas. This takes a bit more coordination, as it requires you to keep one finger on the canvas while a second finger selects, but it allows you to keep your drawing tool active and stay in flow.
- Lasso = tap+hold+drag on the canvas to select one or many strokes at once
- Item Picker = tap+hold, then tap on the canvas to select one stroke at a time
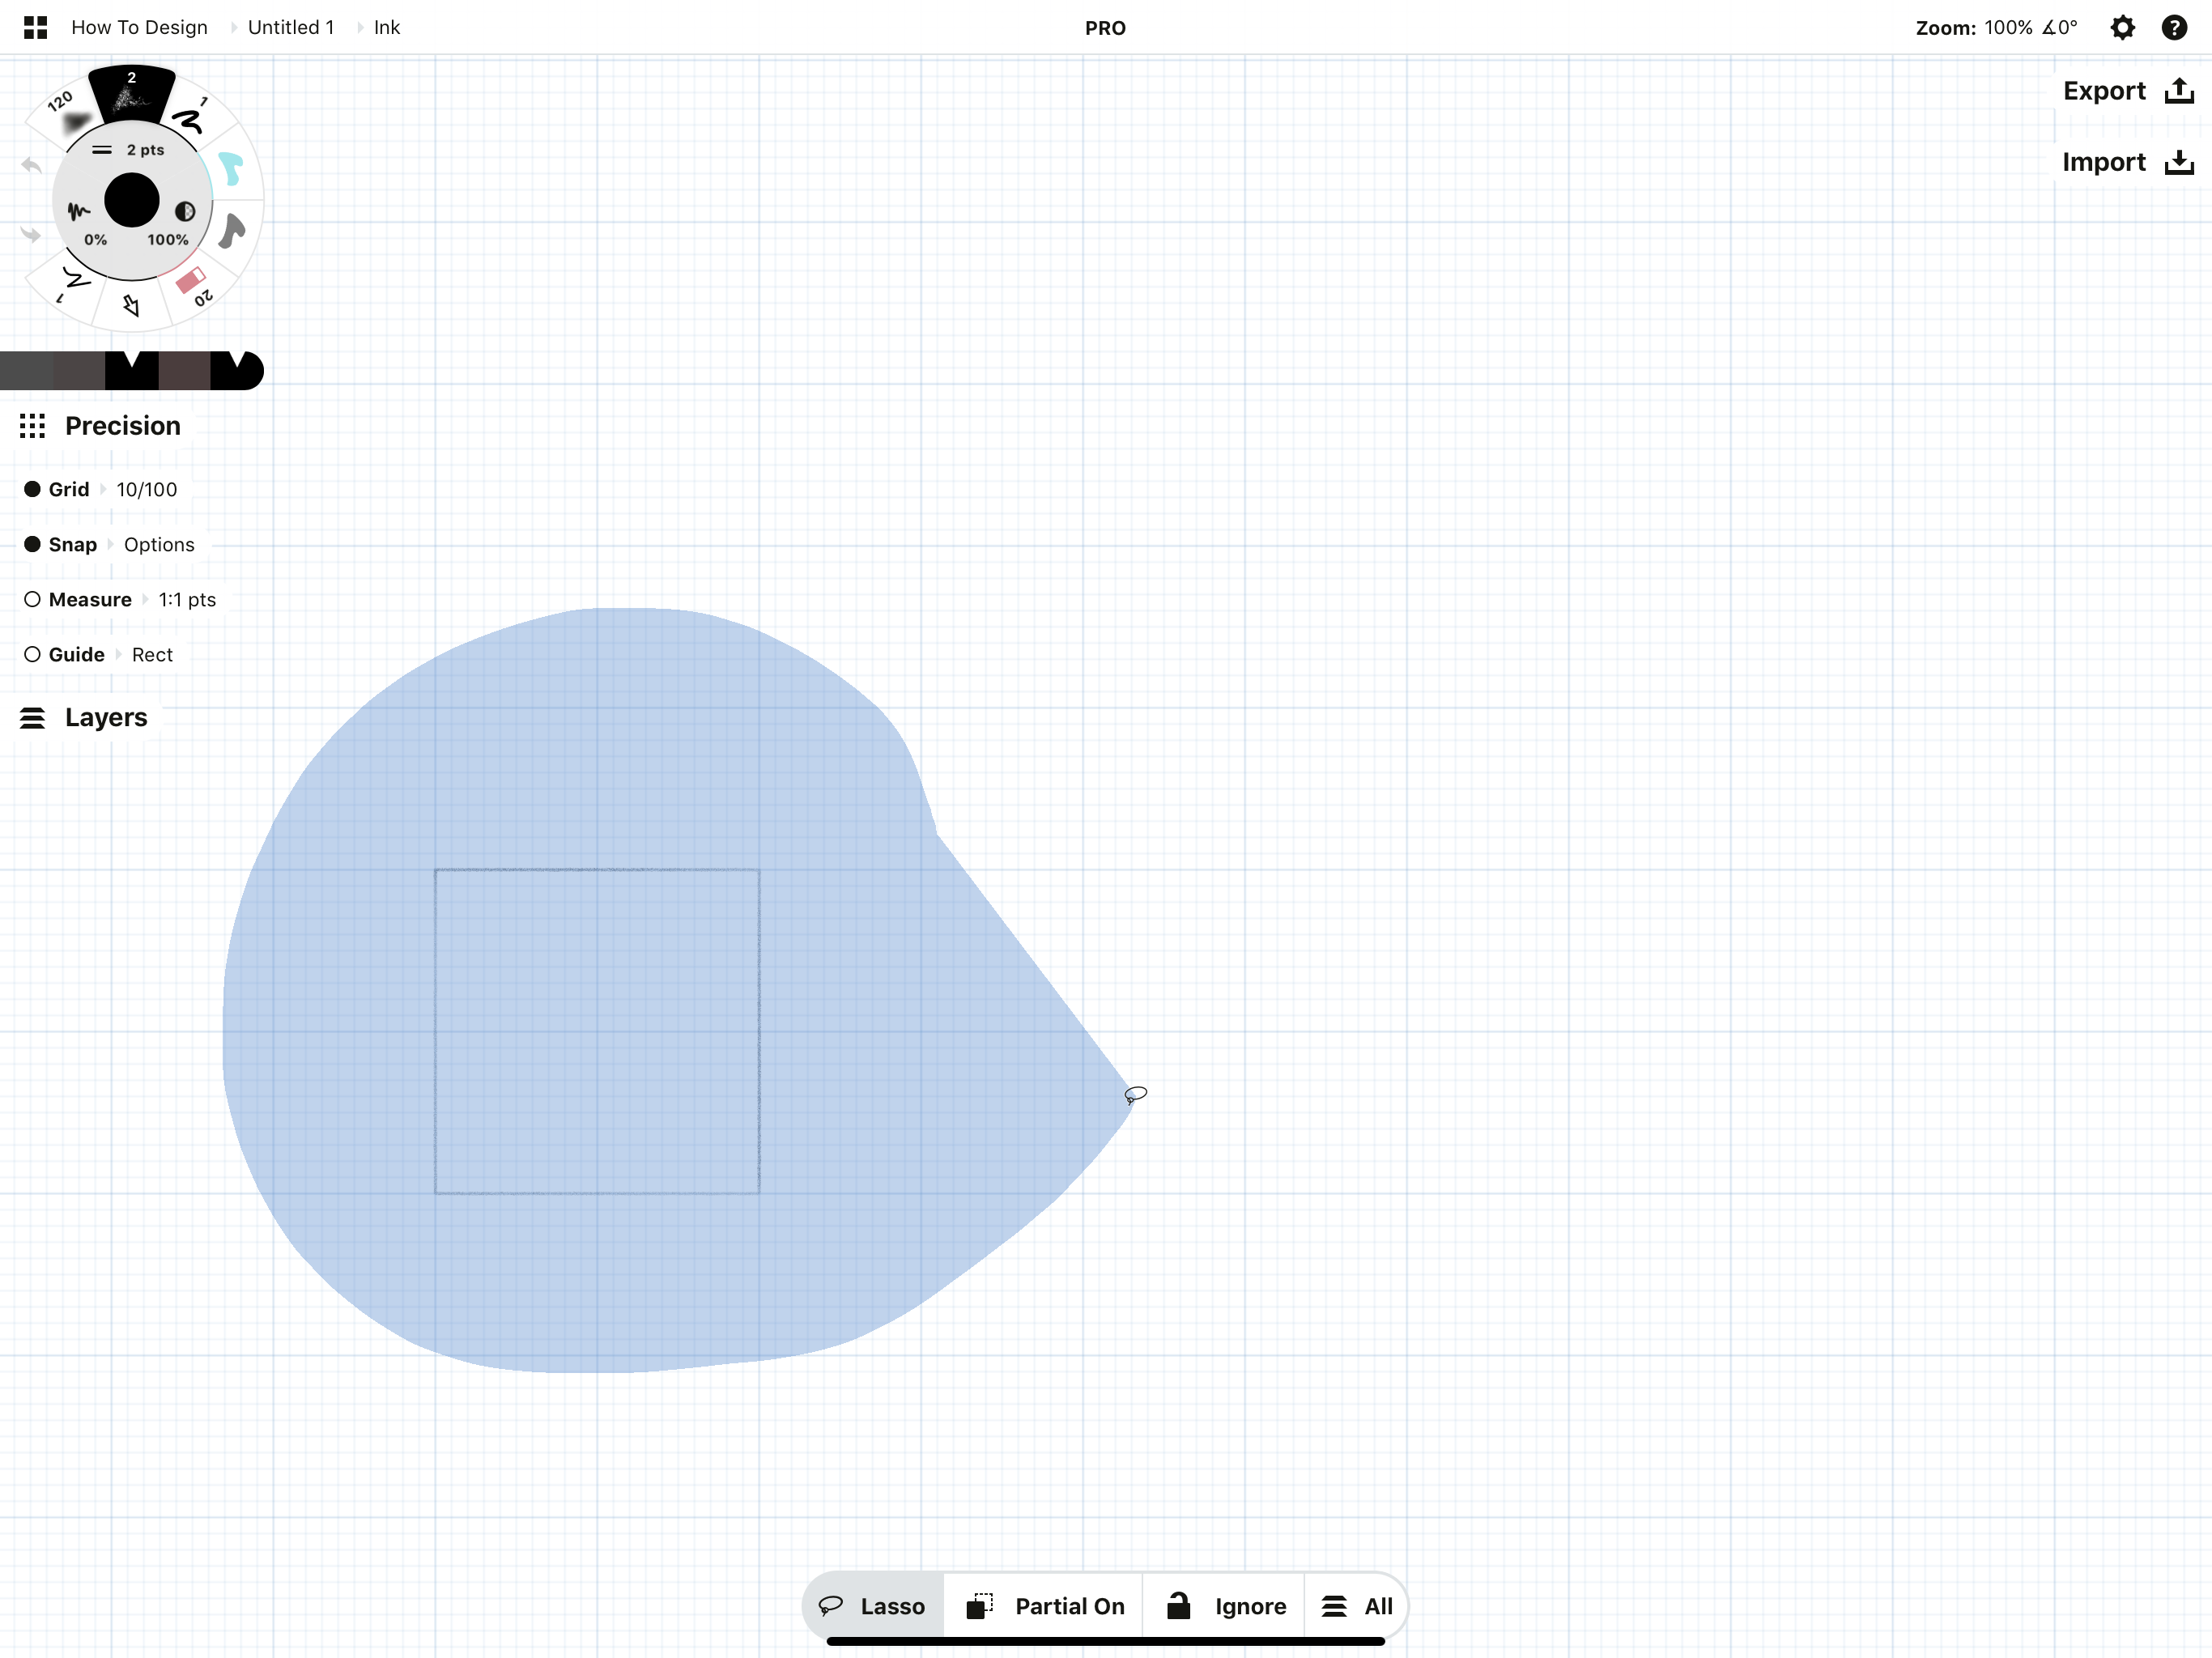
Whichever you choose, you'll see a Selection popup appear at the bottom of the screen. The first tab on the left reads Lasso. If you were to tap this button, you would toggle it to Item Picker. If you were to tap a third time, you'd find the Color Picker. Let's stay with Lasso for now.
Tap+hold+drag your finger around the square, and lift your finger. Your square is now selected.
Do you see the popup that appeared above your selection? Tap the "Duplicate" icon.

4. Great. Now drag your duplicated square up one diagonal grid square. It will snap into place.
Deselect the square by tapping the canvas away from your selection.
5. Let's complete the cube. In the Precision menu, find the Line guide and activate it.
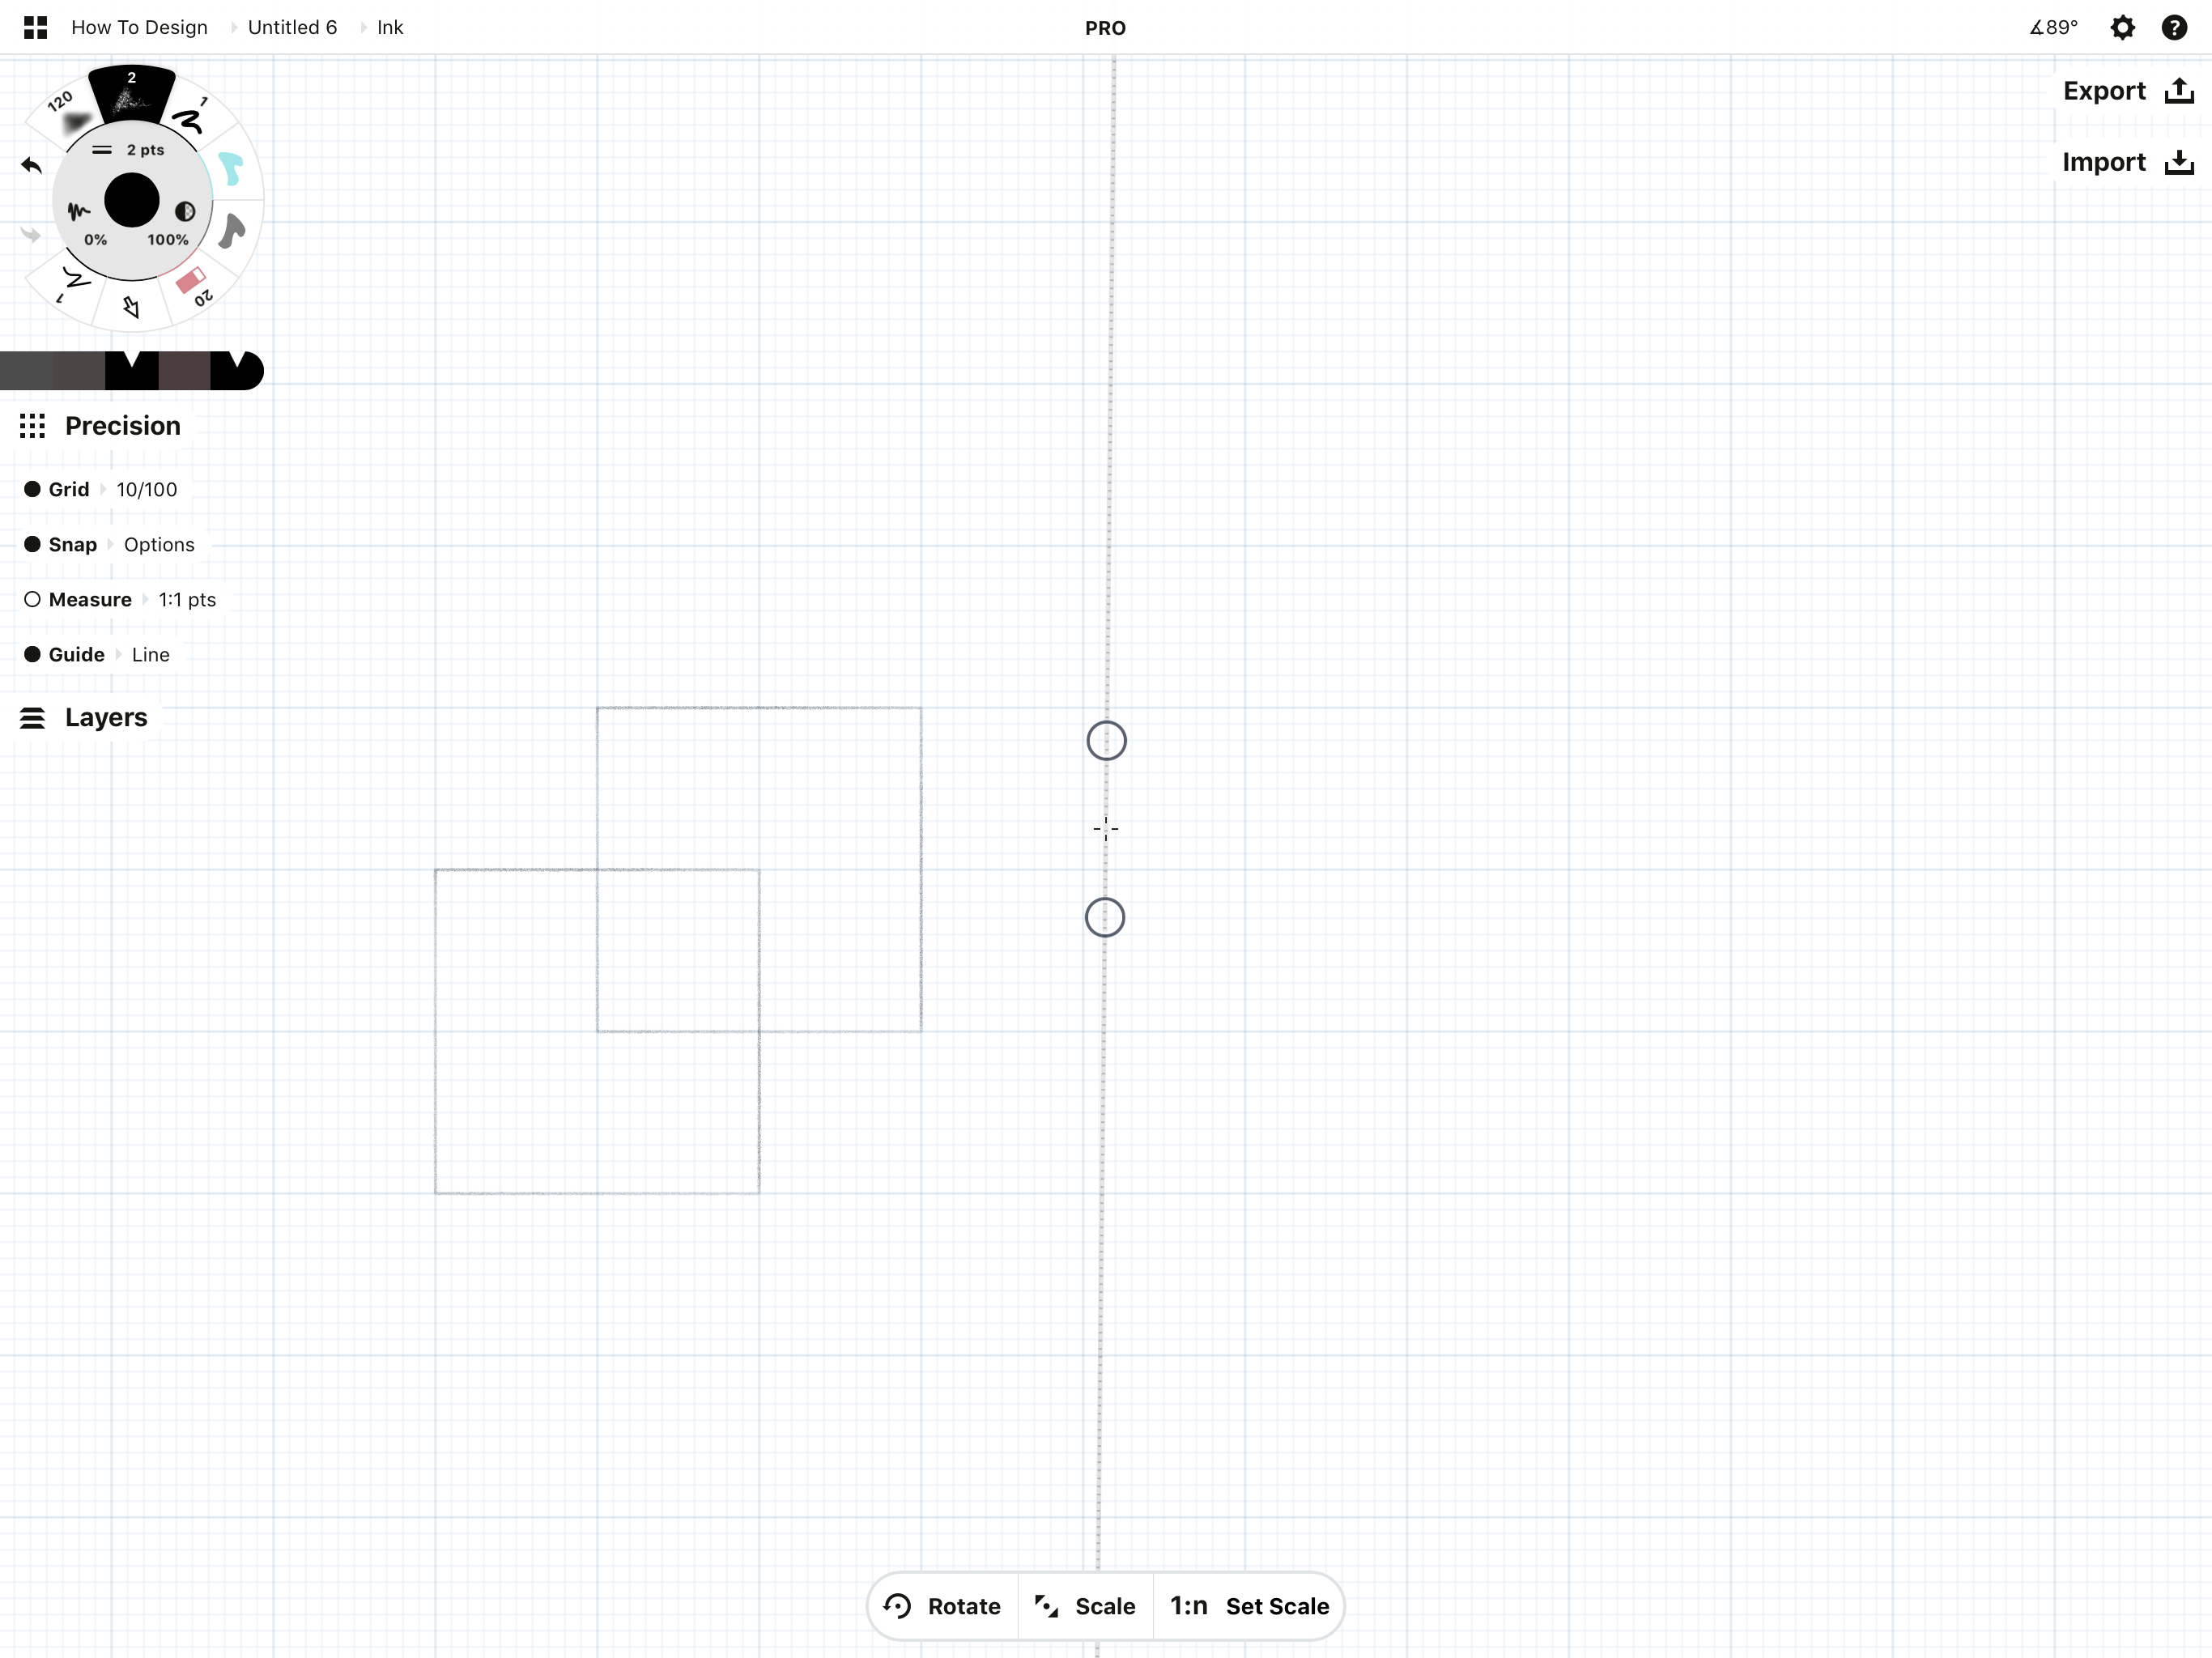
You can see this line goes on forever, great for ruler-like line drawings when Measure is active. But to draw an exact line segment, double-tap the crosshairs at the center of the guide. This will contain your line to the boundaries between the handles.

Now move your line tool so the handles snap to the corners of your squares. Scale and rotate with two fingers, or drag one handle at a time and snap each one into place.
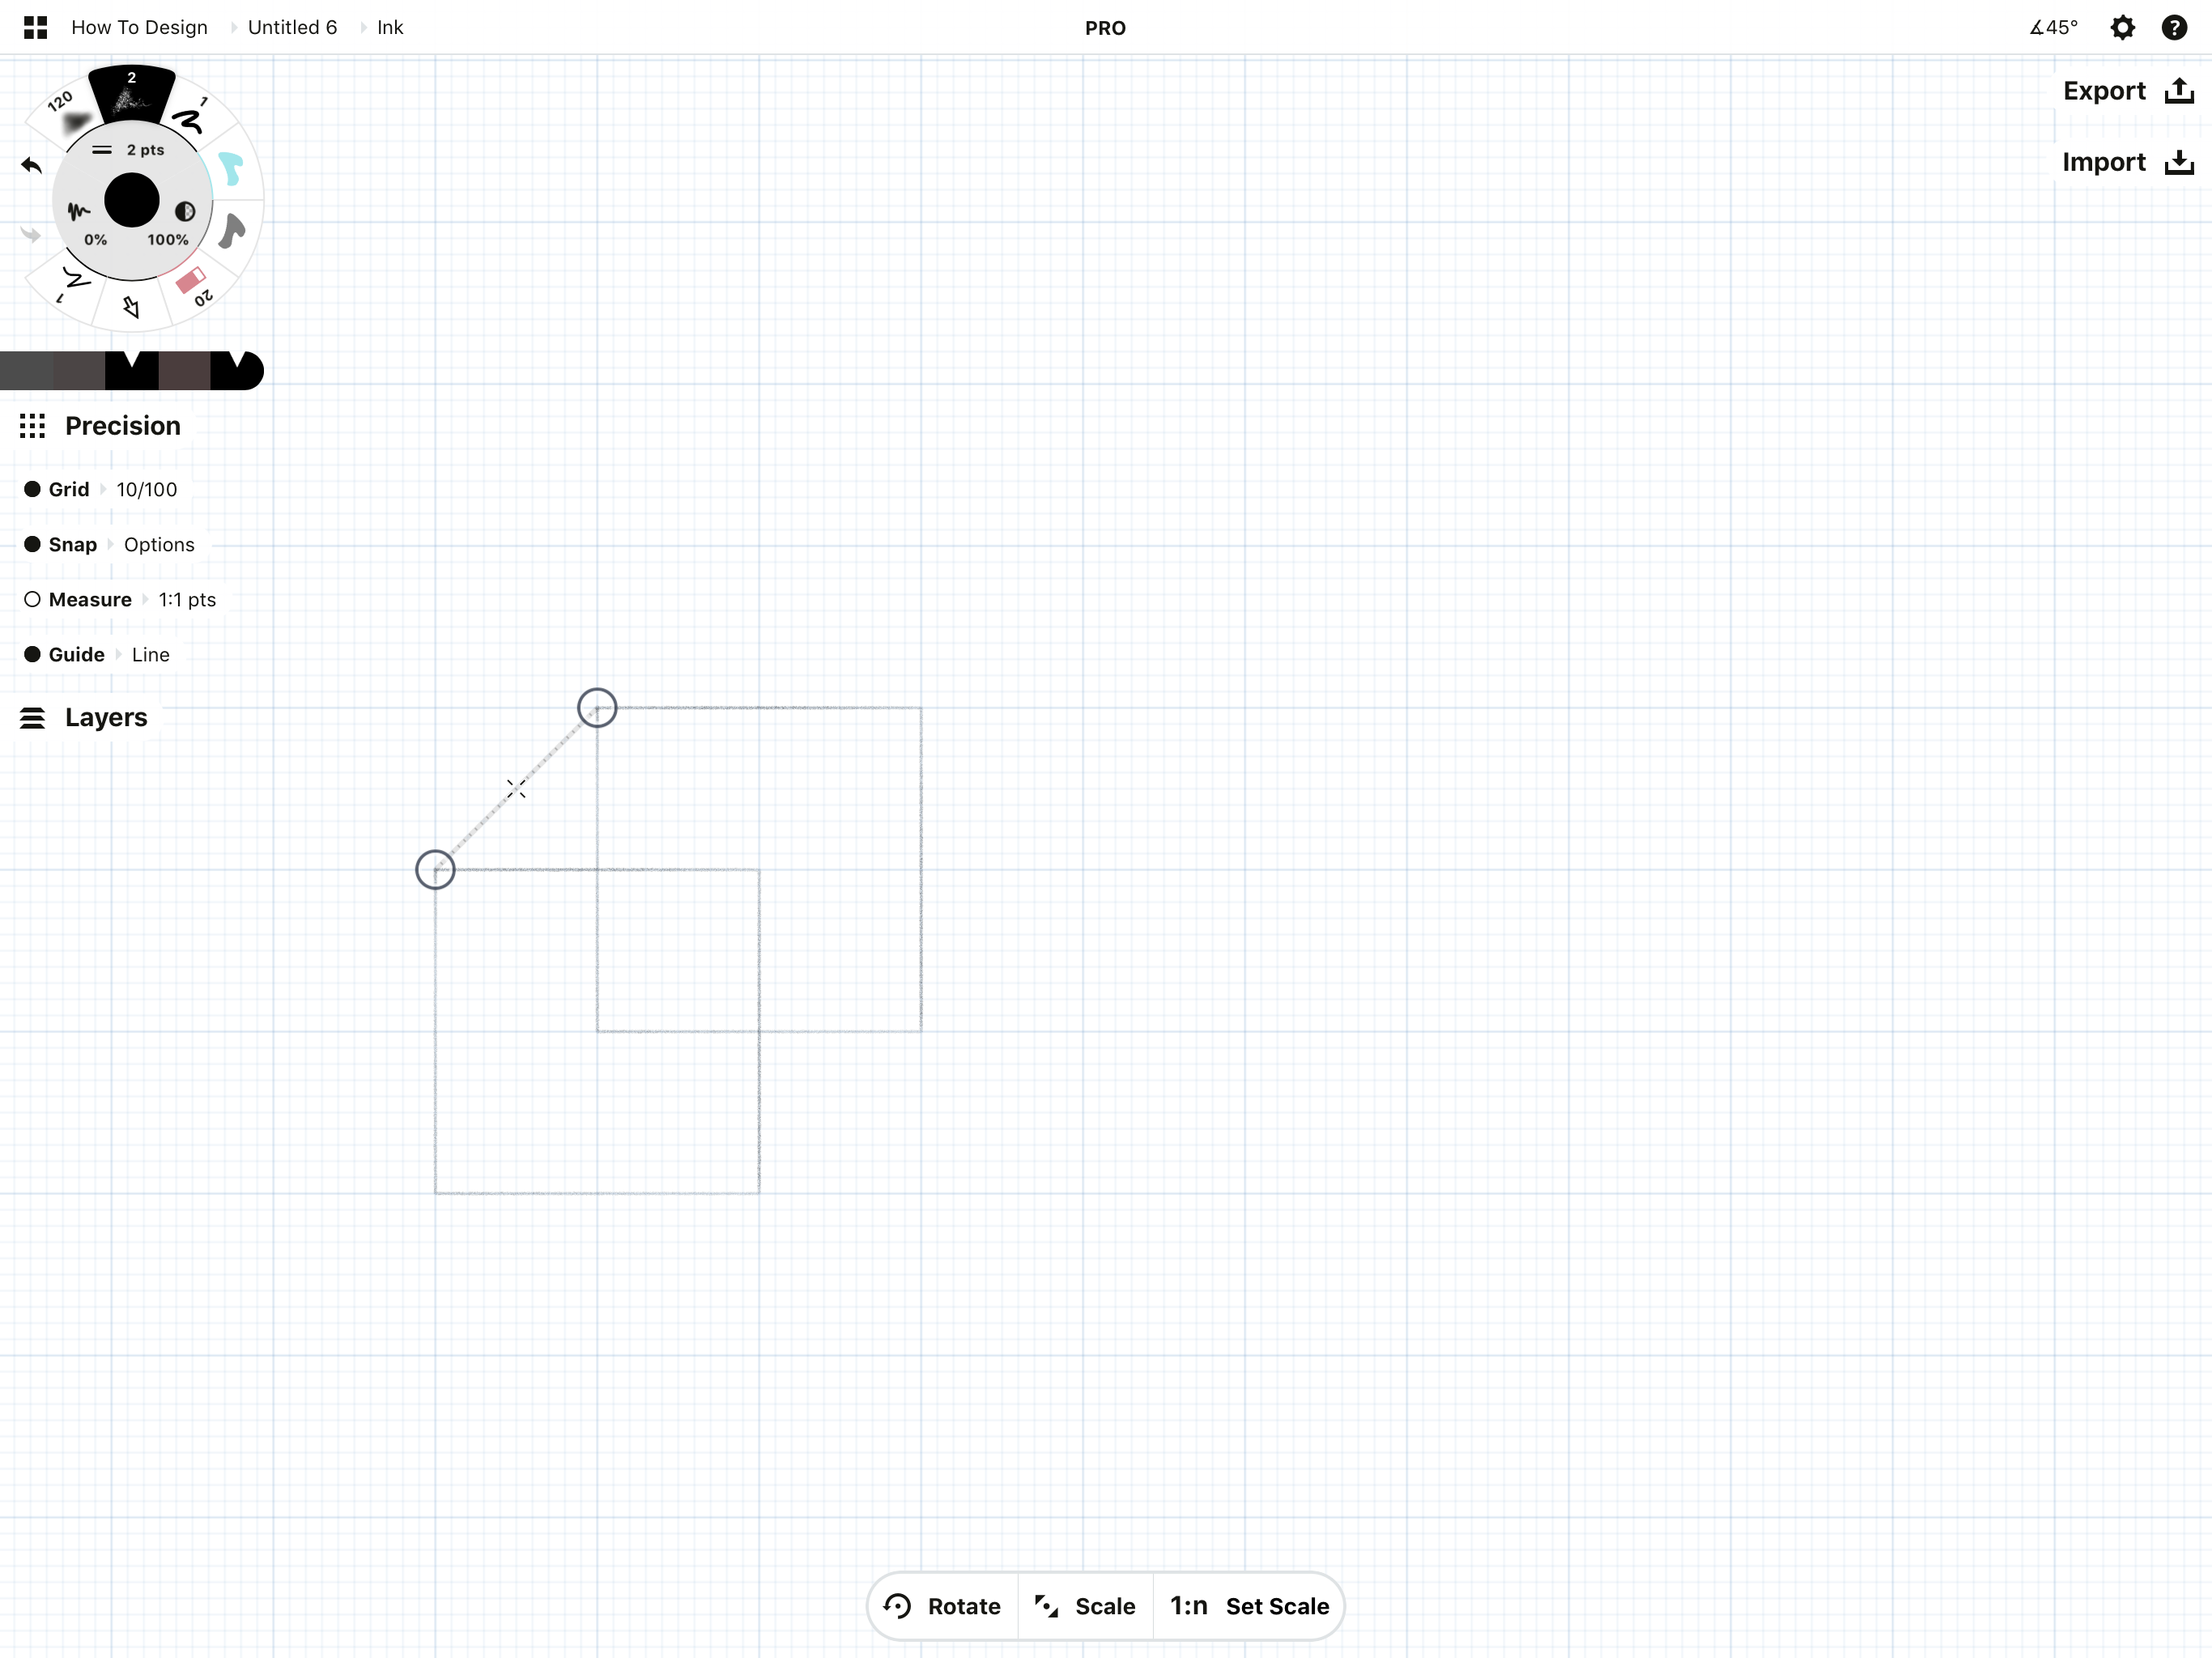
Draw your line. (Remember, it's easier to draw next to the guide so you don't snag a handle.)

Now deactivate the Line guide and select the line you drew, just like you did with the square. Duplicate it a couple times and drag the lines to your other corners to finish off your cube.

We could add a line to the remaining left corner but as we won't see it in the final shape, this cube works great as is. Well made!
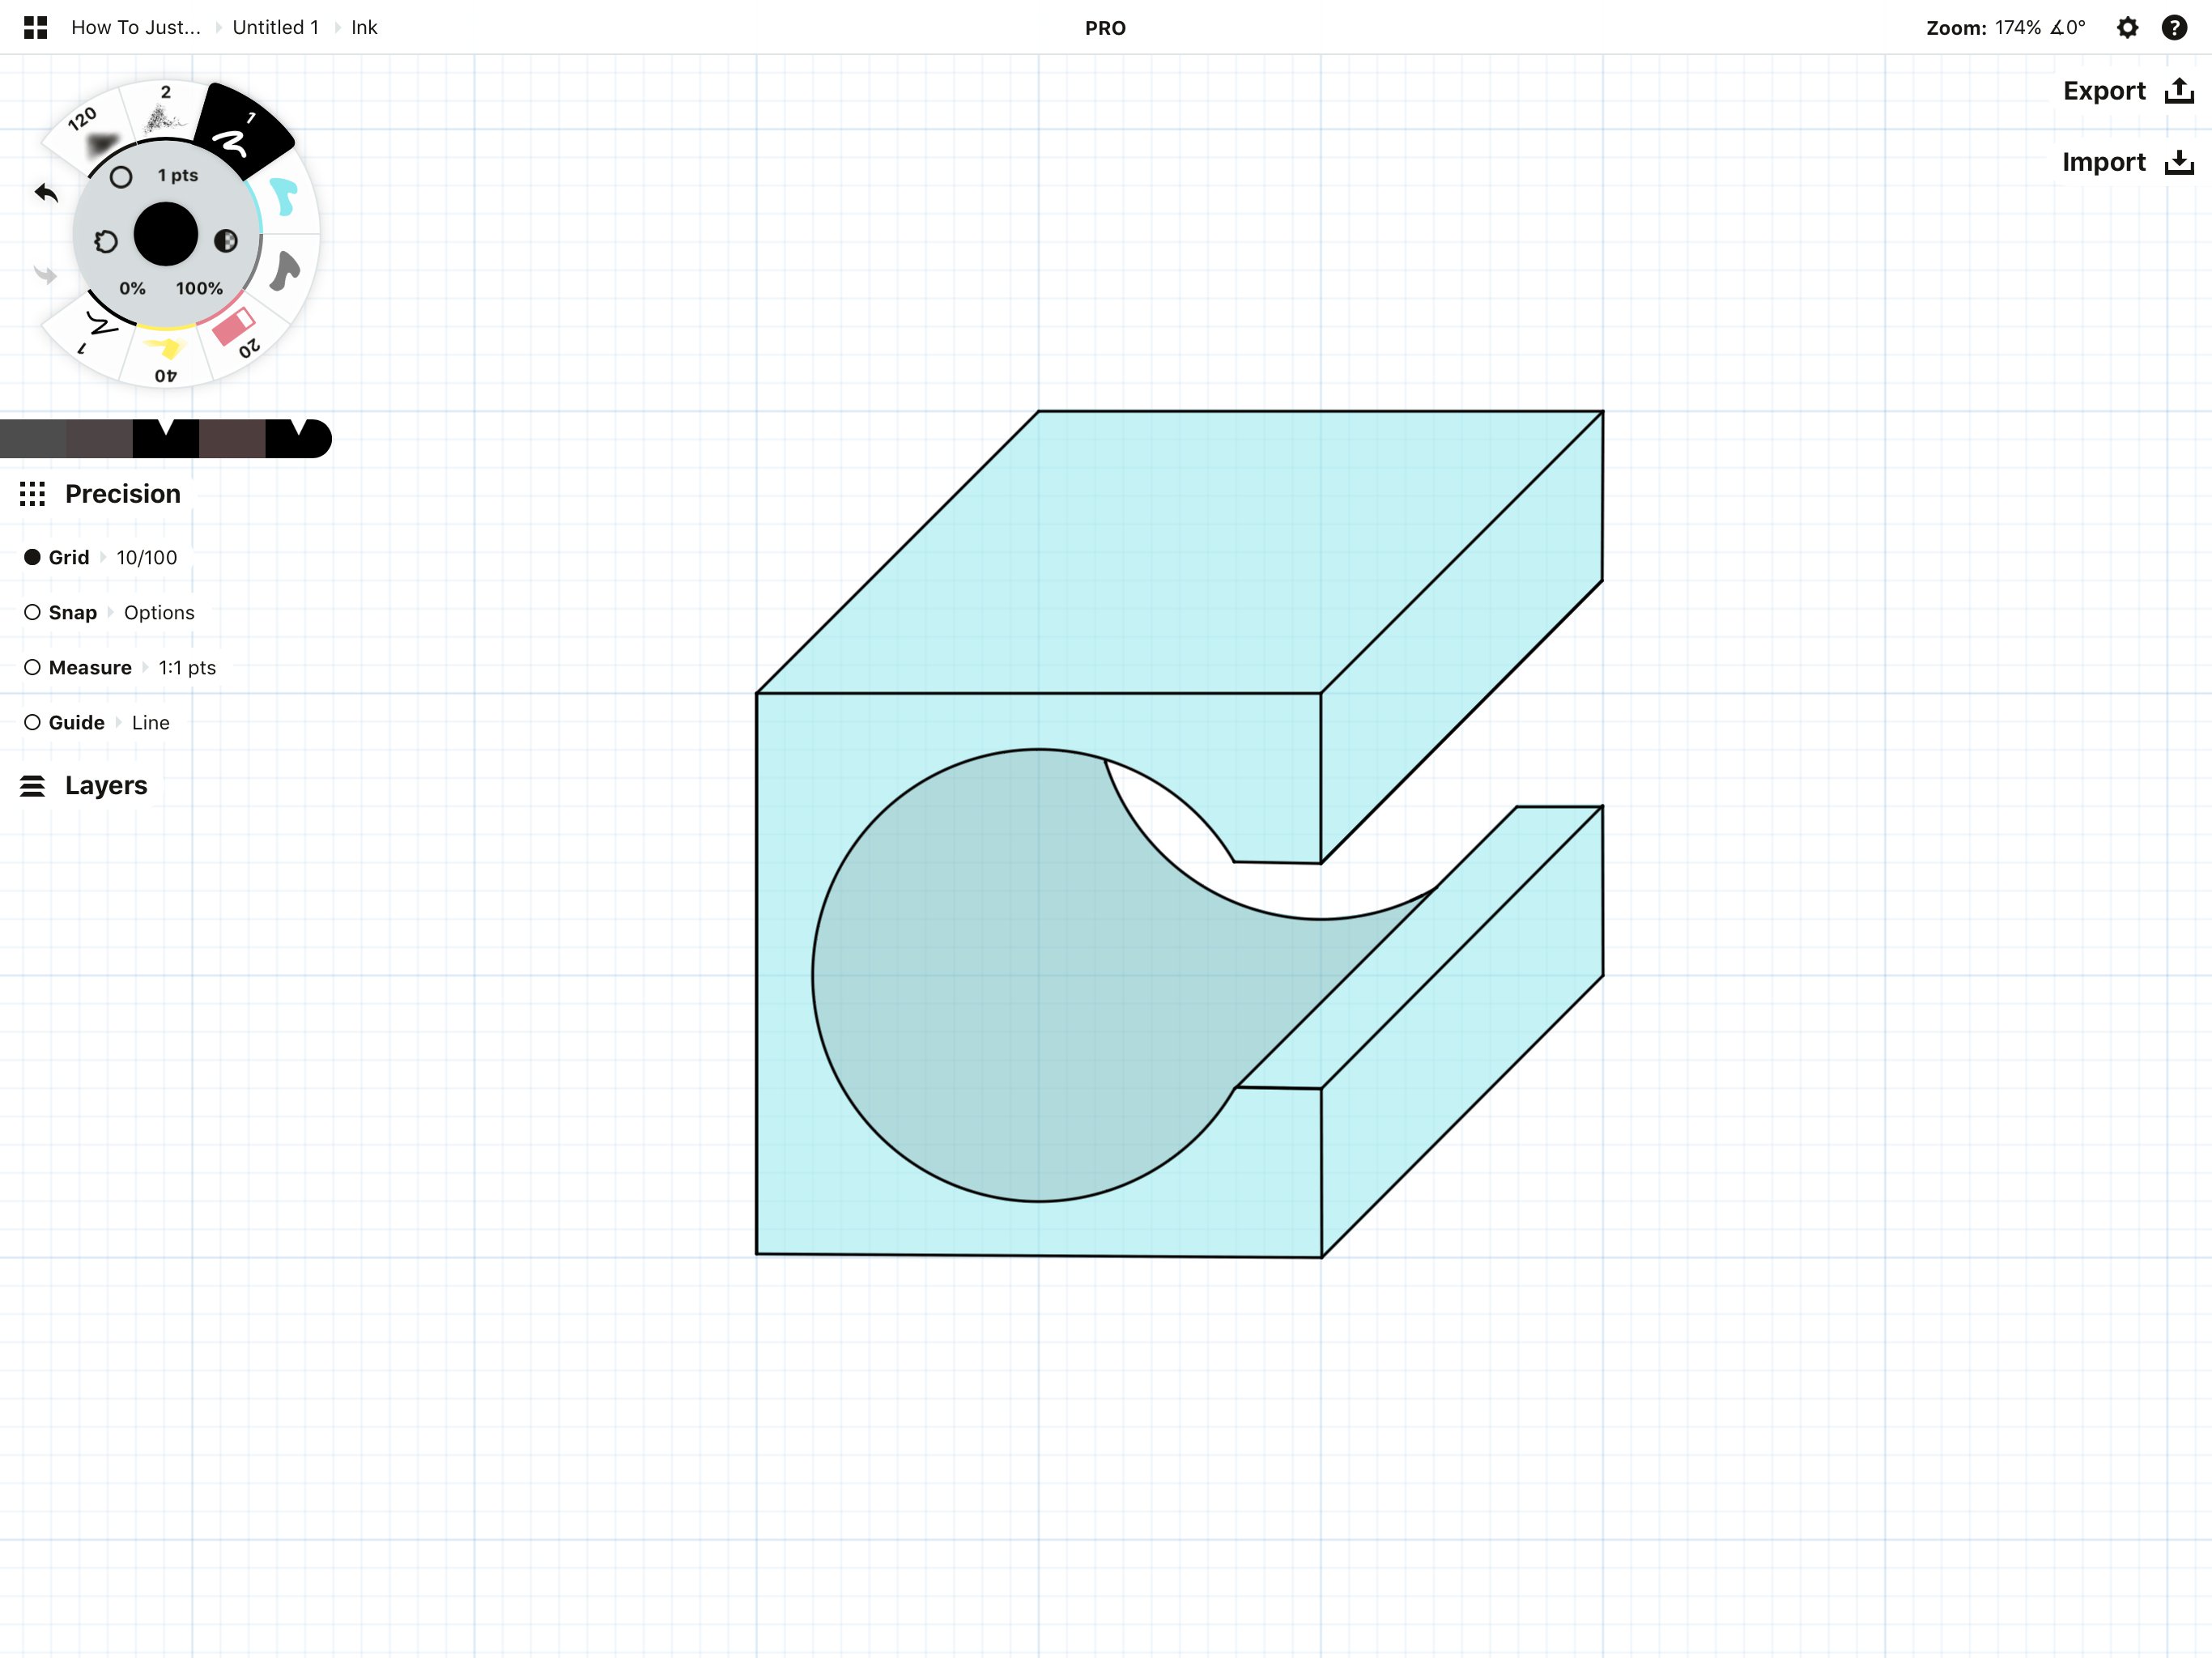
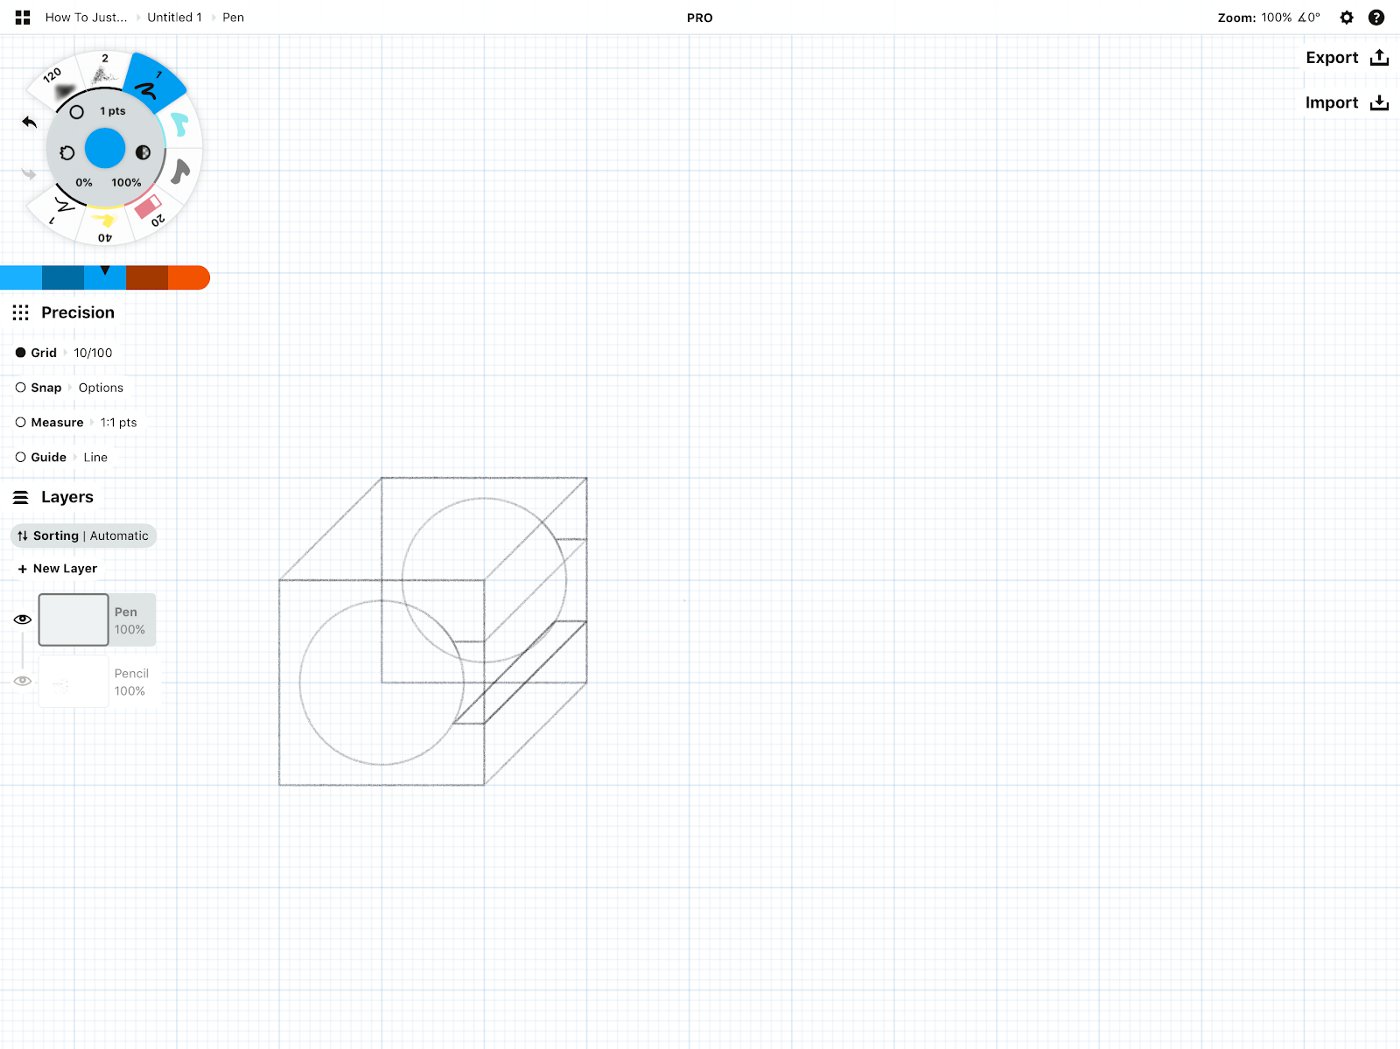
Drawing the Inner Circles and Details
Let's move on to drawing the circular shapes inside the cube.
1. Activate the Ellipse guide.
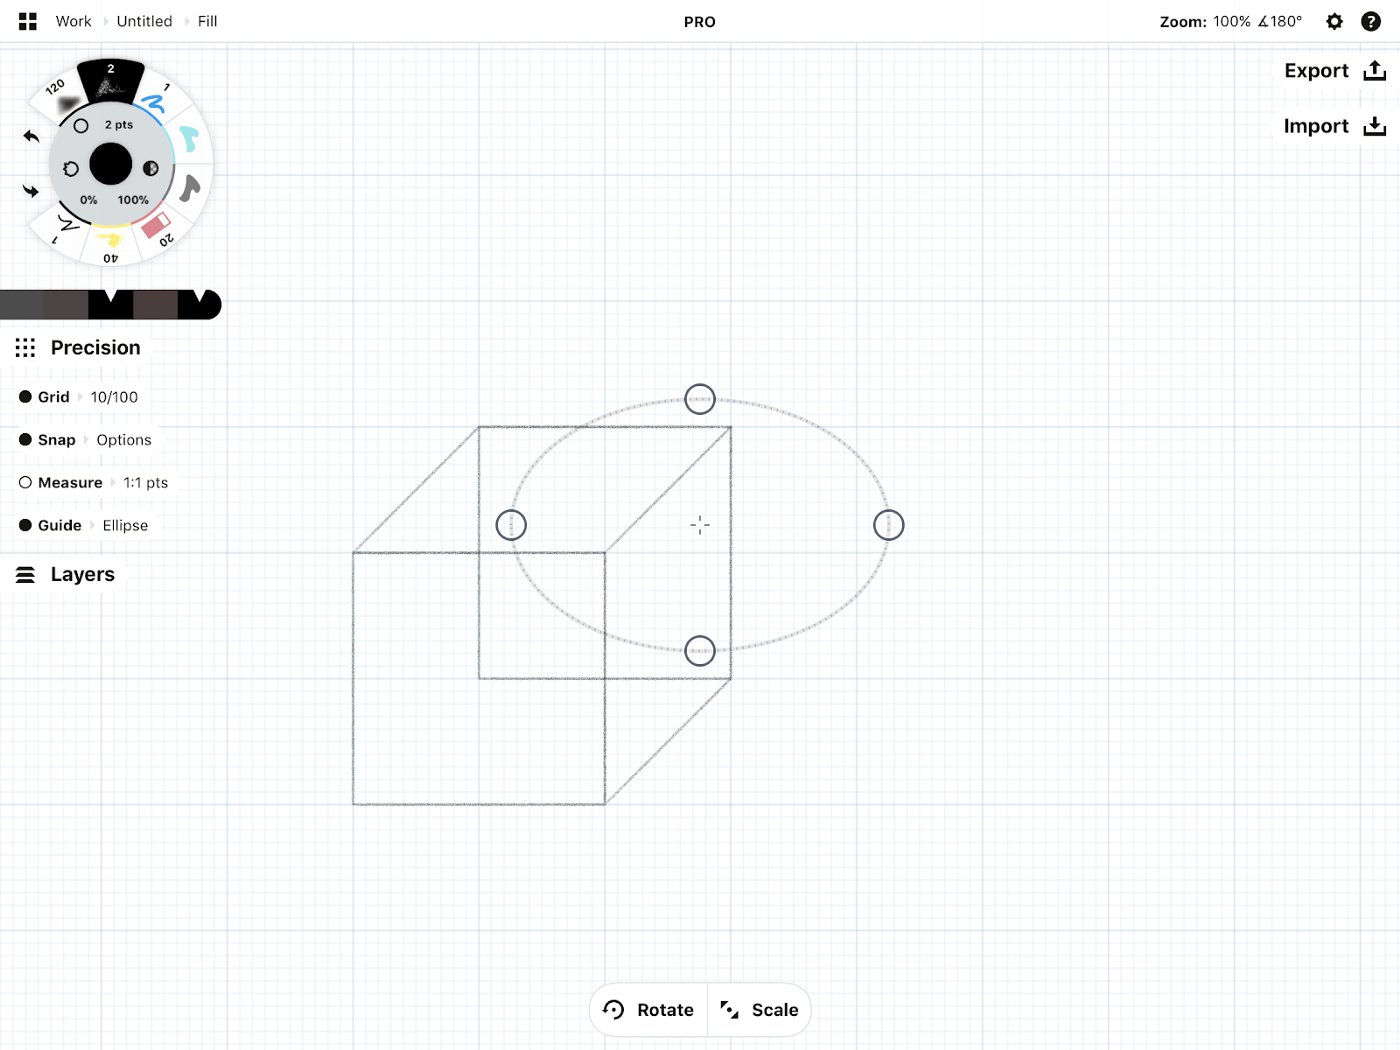
Double-tap the crosshairs for a perfect circle.
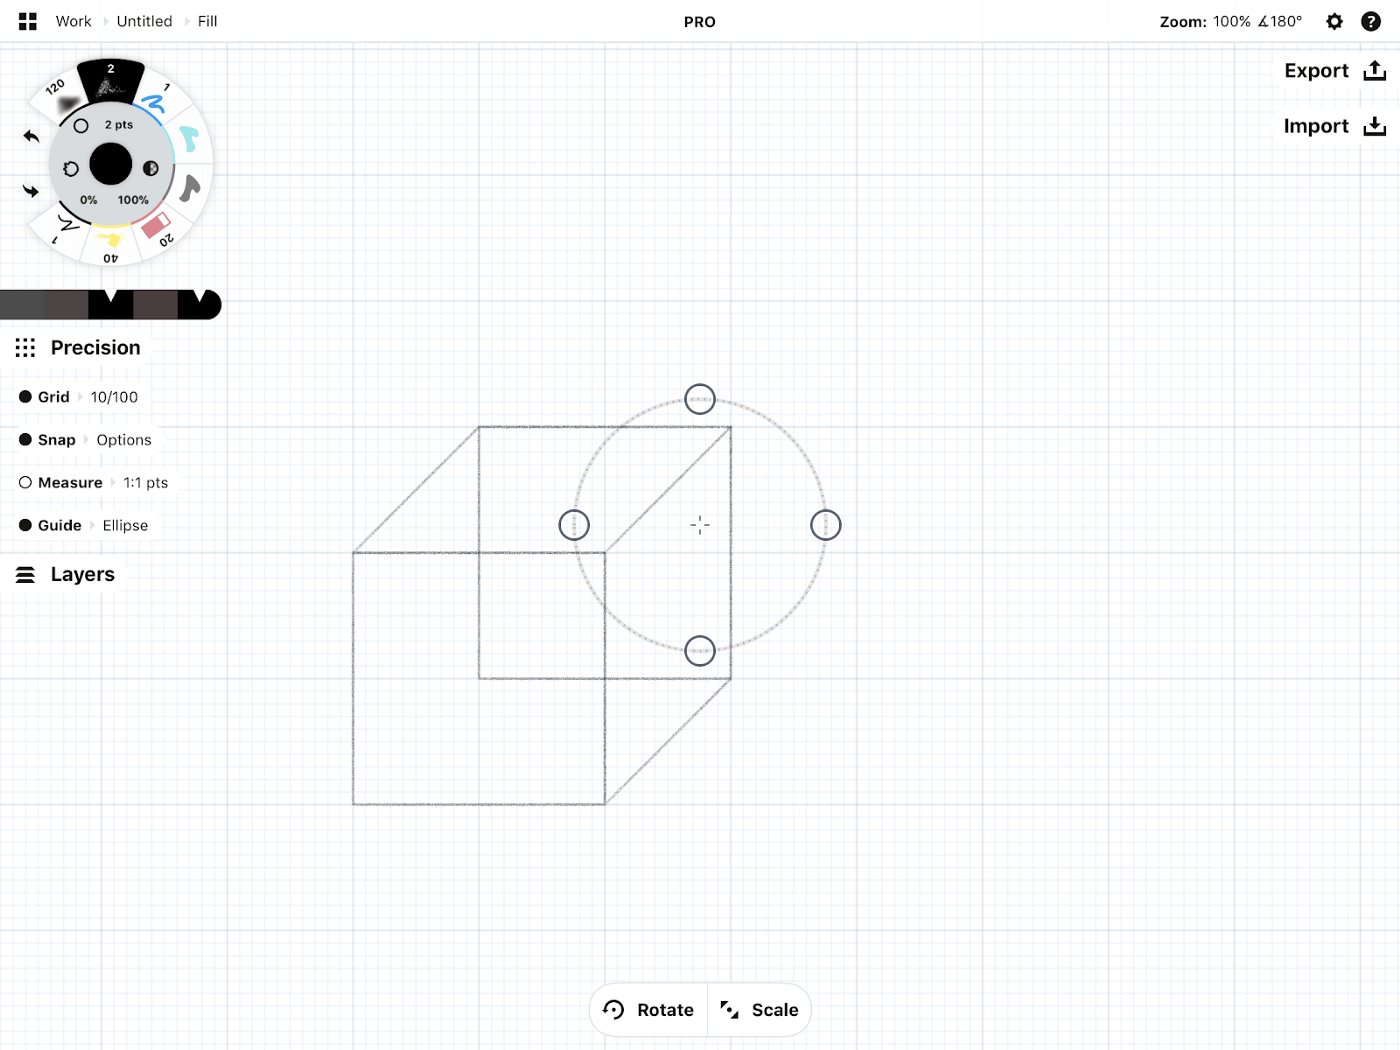
2. Drag the circle to the center of your first square. The center point will snap right onto the corner of the overlapping square.
Now use the grid to determine the the circle's distance from the square perimeter. This circle is two grid units smaller than the square at their nearest points.
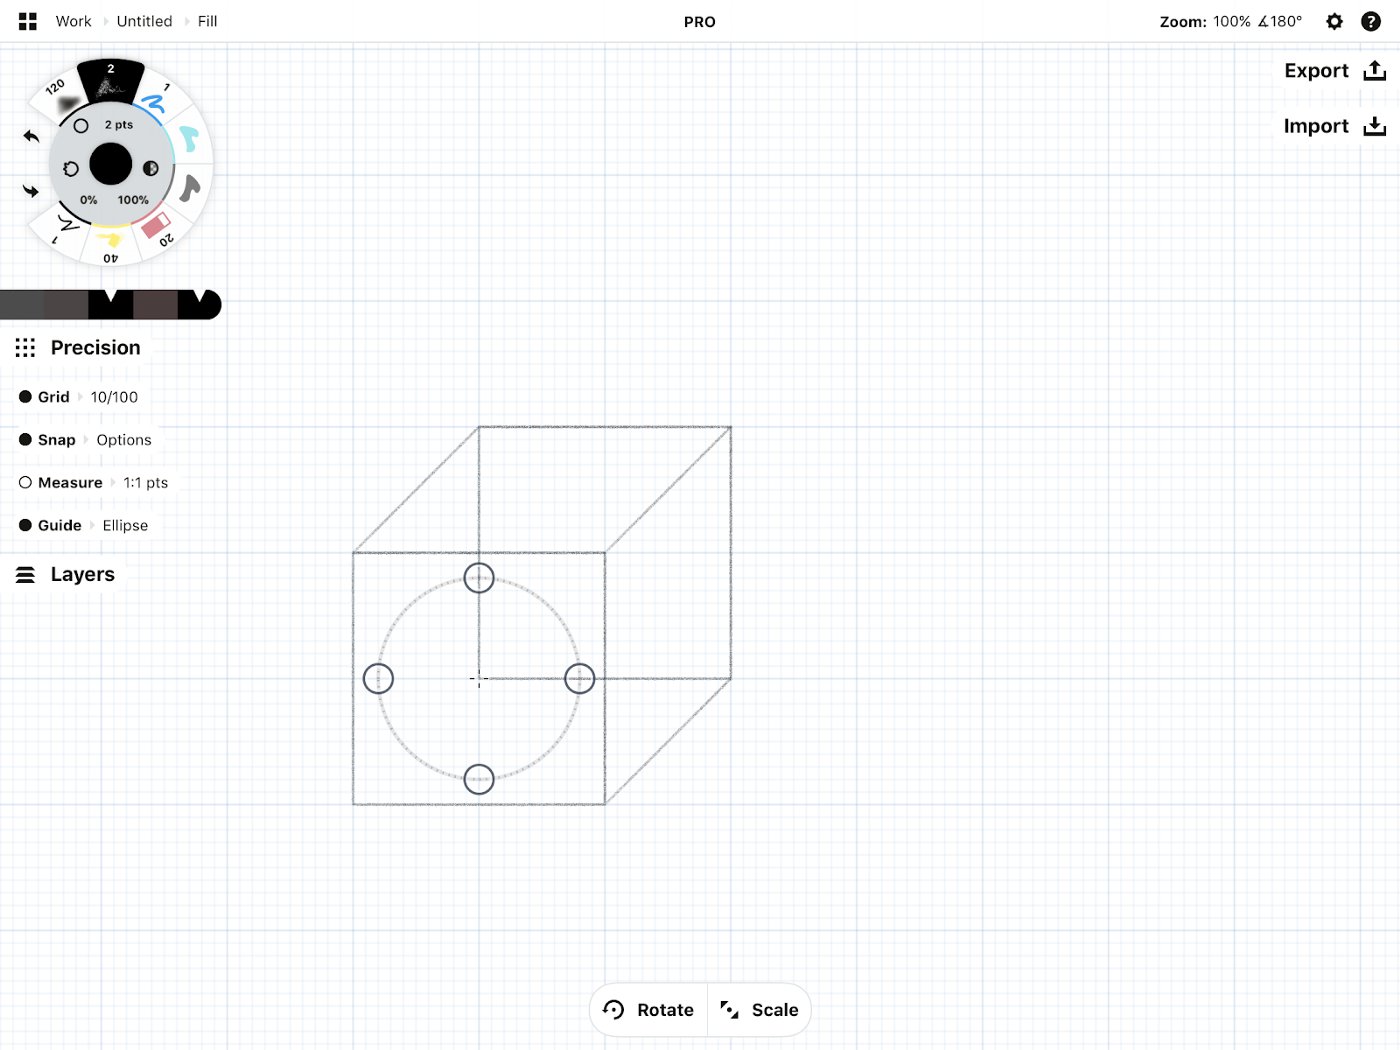
Pencil in your circle, then deactivate the guide.
3. Select your circle, duplicate it, and move the copy to the center of the second square.

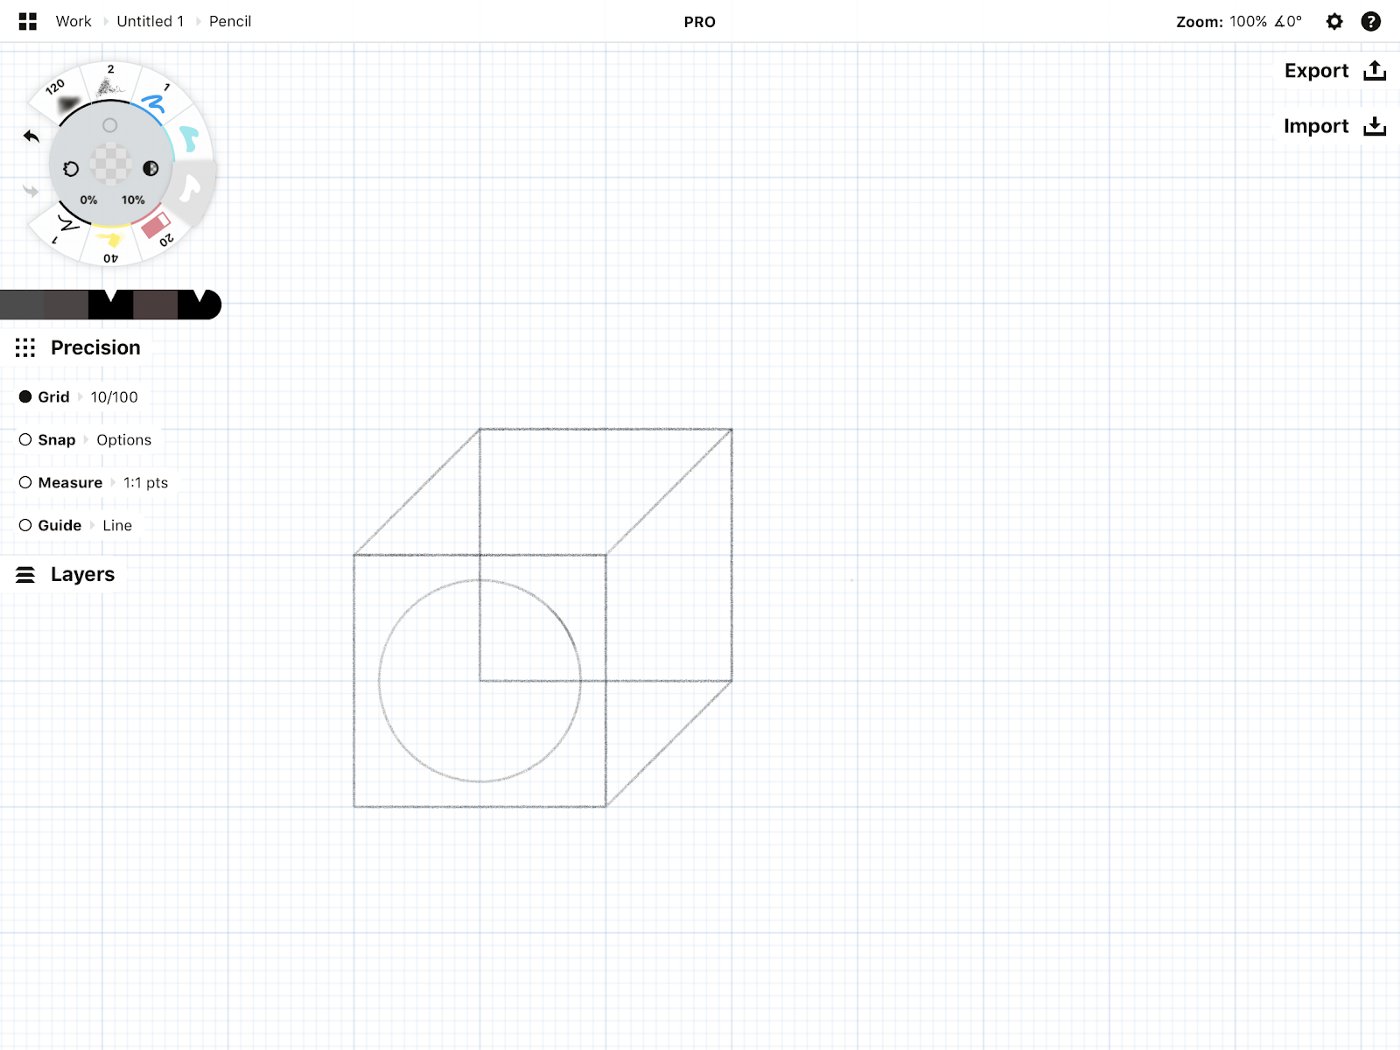
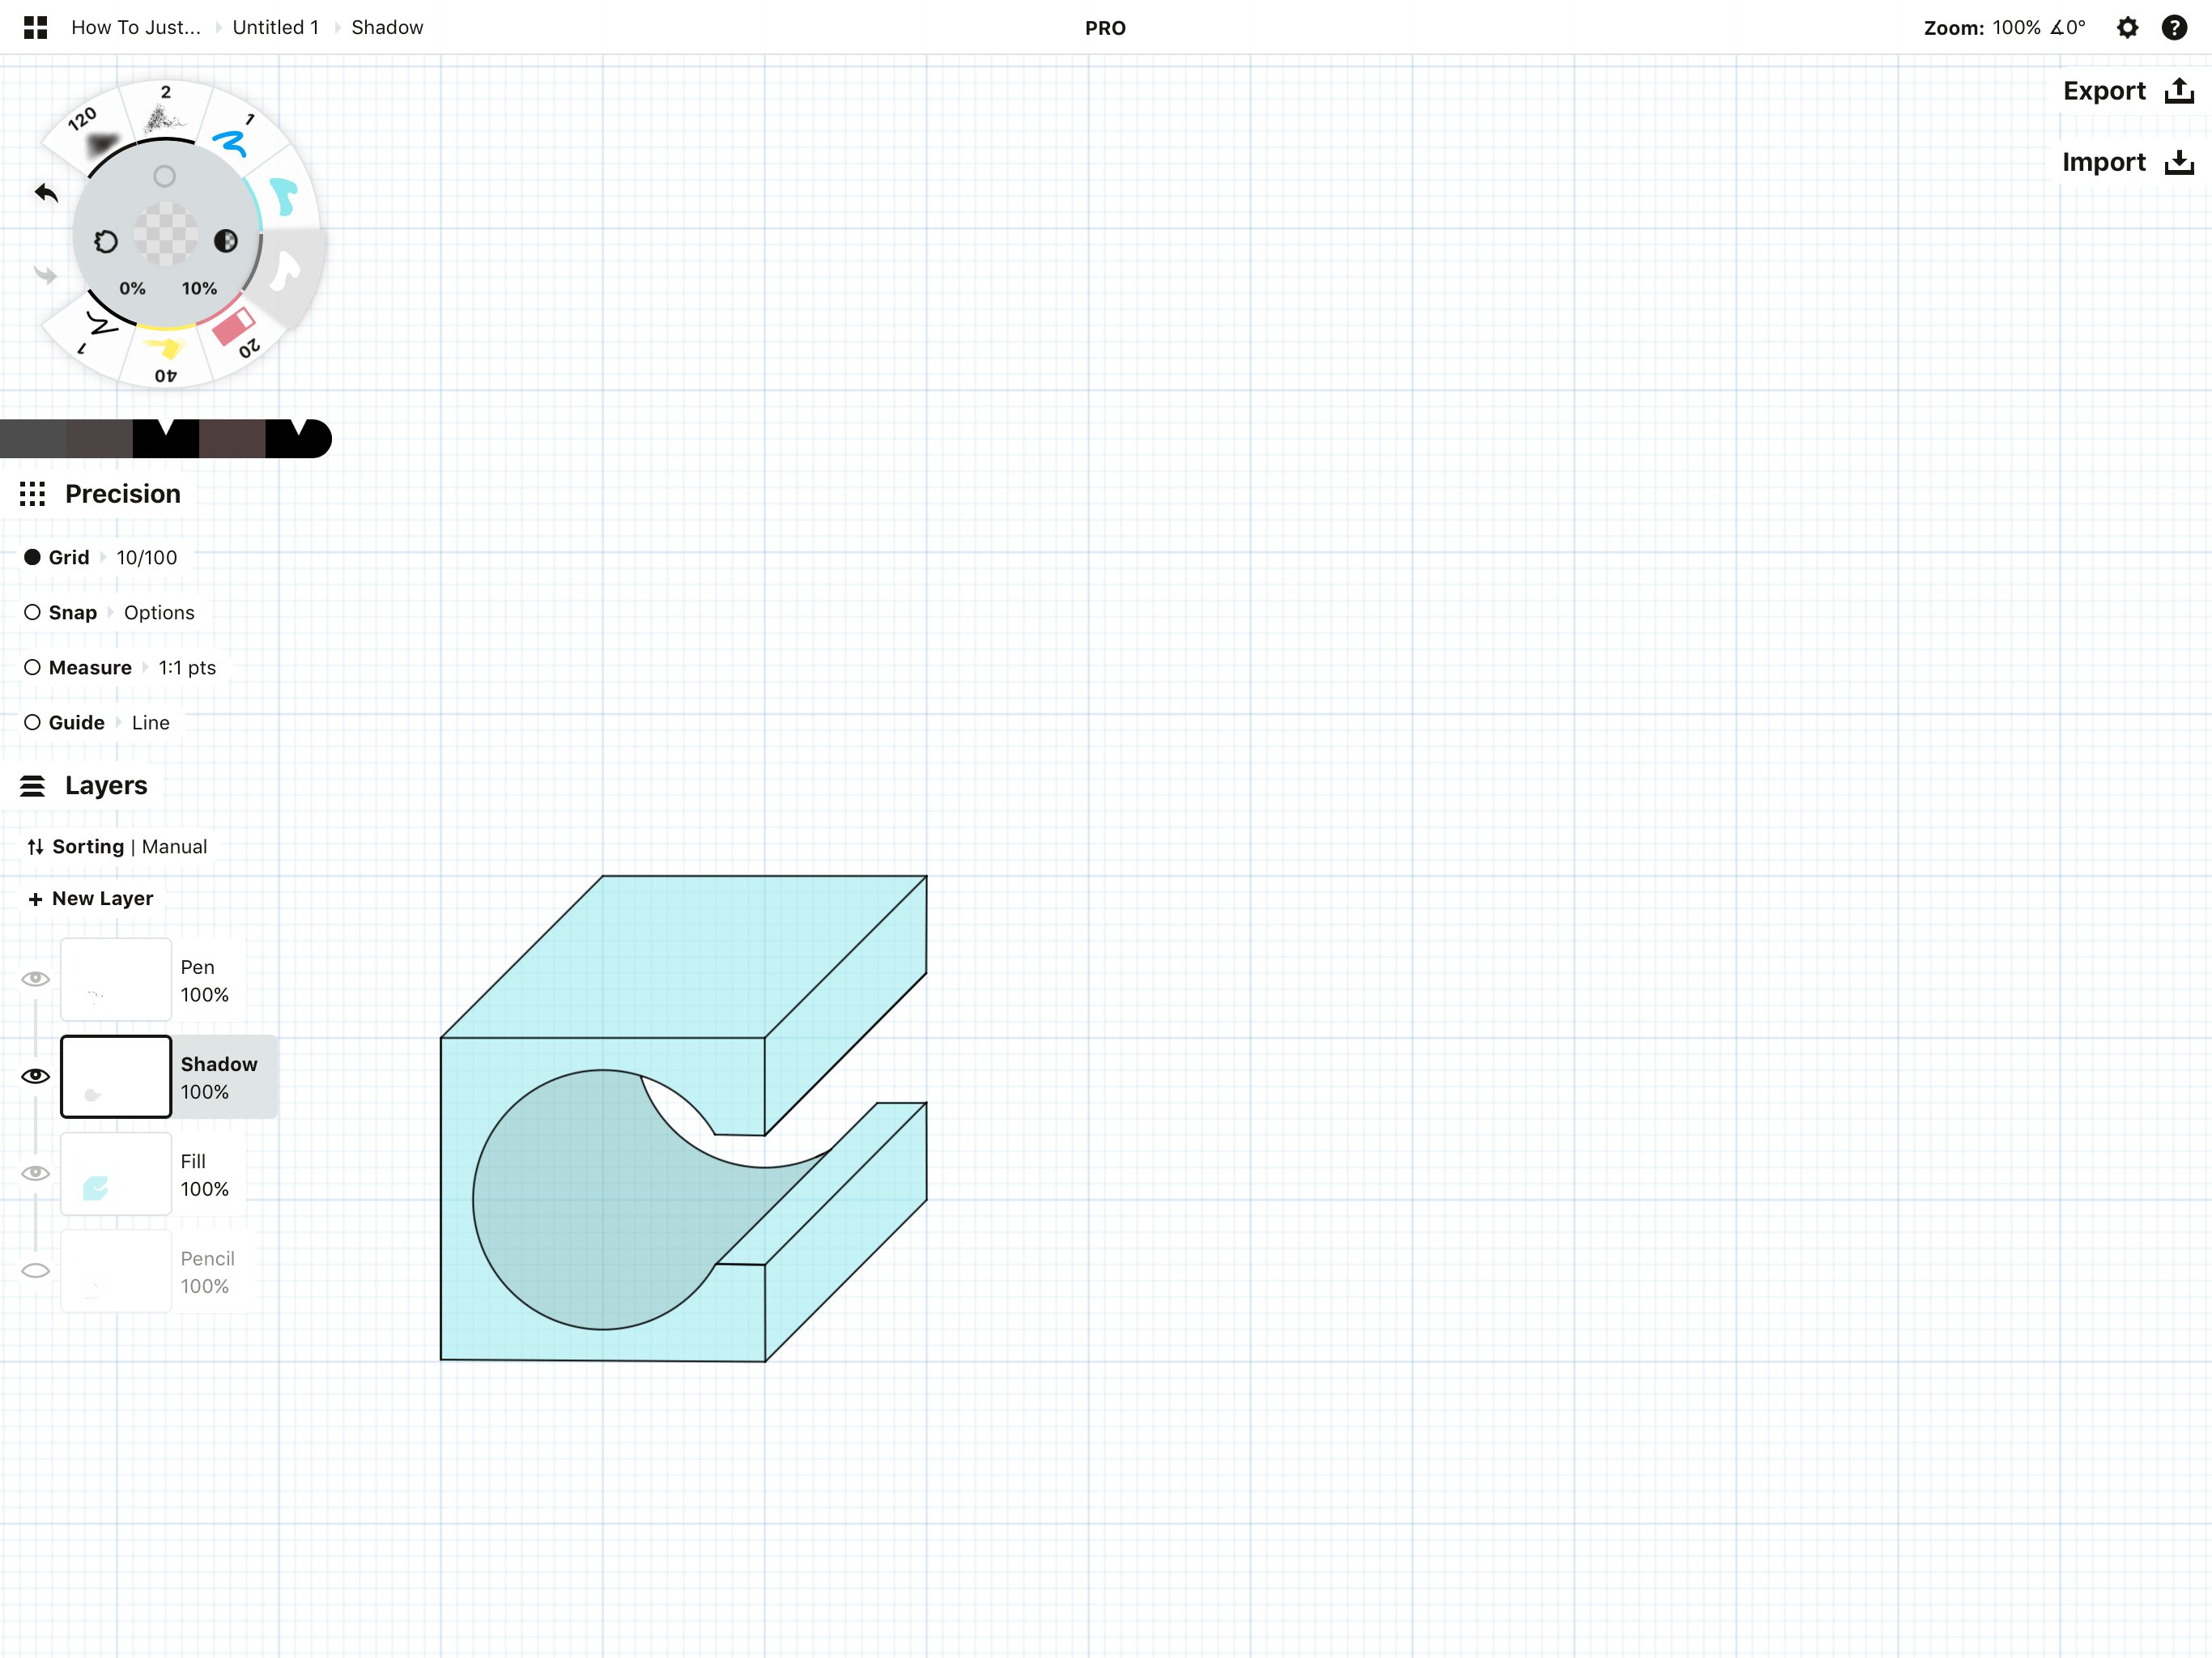
Excellent. This is the main structure for our design.
4. Now take a moment to add a few more lines to cut into the shape on the right side. Use the Line guide and grid to help you.
We have a final, underlying form for our object. You can sip a glass of victory drink to celebrate, or move on to the next step (both good options).
Inking Your Design
The next step is to ink over the shape. We'll use layers to separate the rough sketch from the more polished drawing. Layers help you to organize elements of your drawing, and give you control over your design so that selecting and editing lines, experimenting with different looks, and displaying your work is as simple as toggling a layer. (Here is a complete tutorial on using Layers.)
1. Tap the Layers menu on the canvas to open it.
You'll see you have a couple of Layer sorting options. Automatic is the default mode and sorts for you automatically by tool type. If you toggle the mode to Manual, you control which layer you draw in regardless of your tools. Both modes are simple to use and either works for this tutorial.
Select a Fixed Width pen on the tool wheel. You'll notice that in Automatic layering mode, selecting the pen creates a new pen layer. While you're at it, choose a color that allows you to easily see the line difference while tracing.
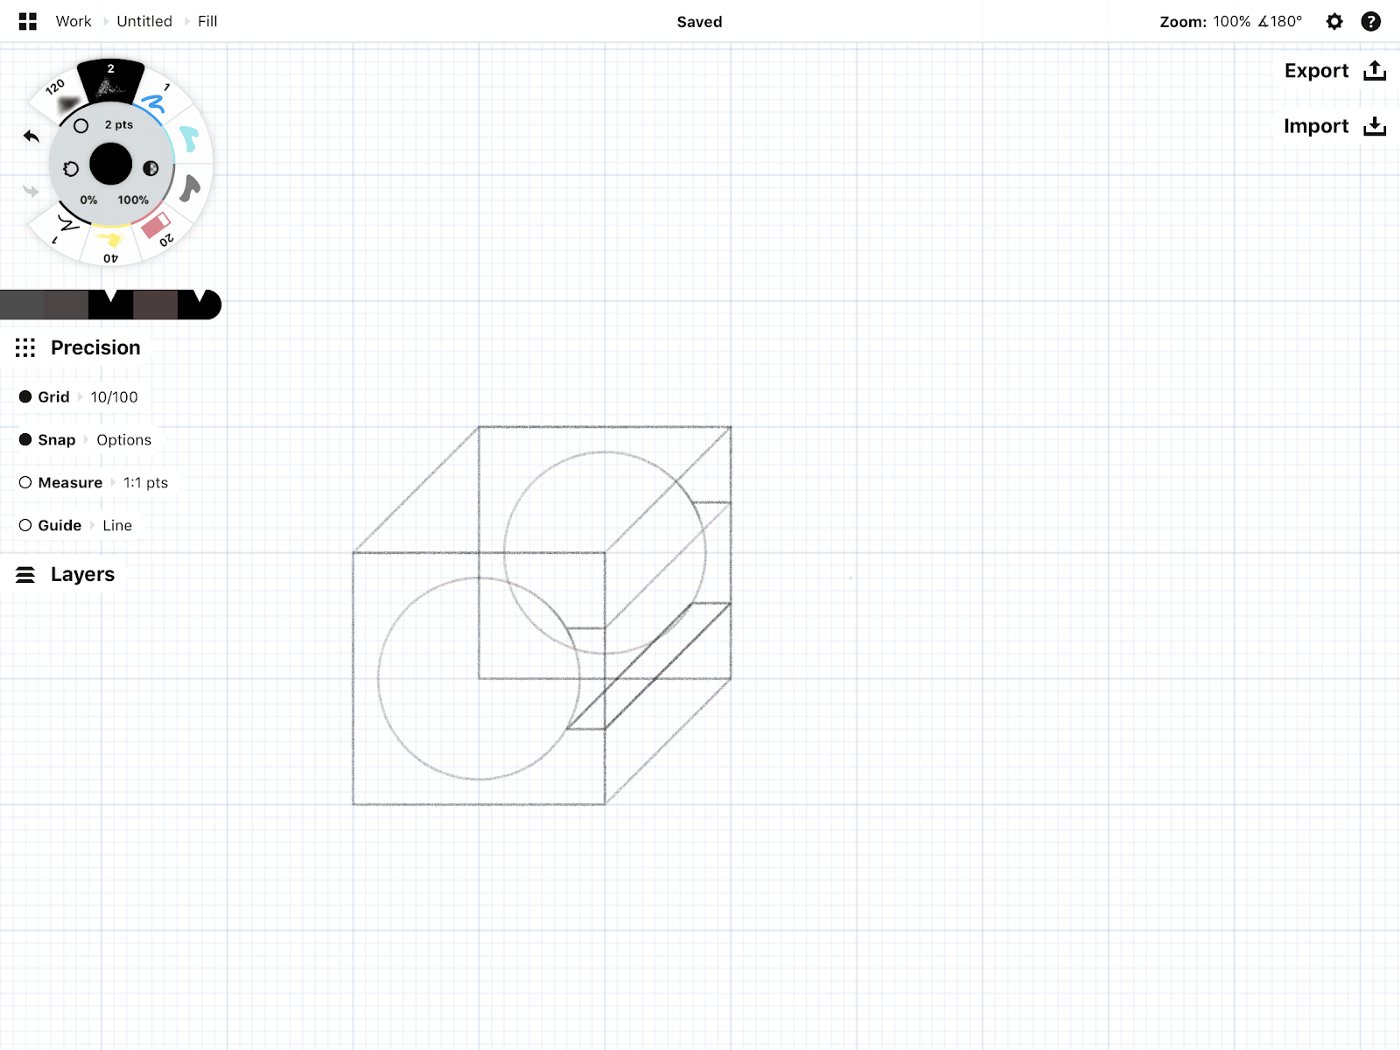
2. Trace the main lines of your penciled object using the Line and Ellipse guides.
Use the Line guide to trace the straight edges, or use the Rectangle guide and trace only part of the shape. When inking the circle, use the Ellipse guide and just trace part way around the circle.

A few hints to make inking faster:
- Use the Line guide for the first line, then deactivate the guide and duplicate, rotate, and resize each line. "Duplicate" is your friend.
- Deactivate Snap if it snaps to places you don't like. Turn it back on when you want it.
- If you're getting confused by where or where not to draw, try decreasing the opacity of the pencil layer. Tap the active layer to bring up its menu and slide along the bar.
- For a live view of layers, watch our Layers video tutorial.
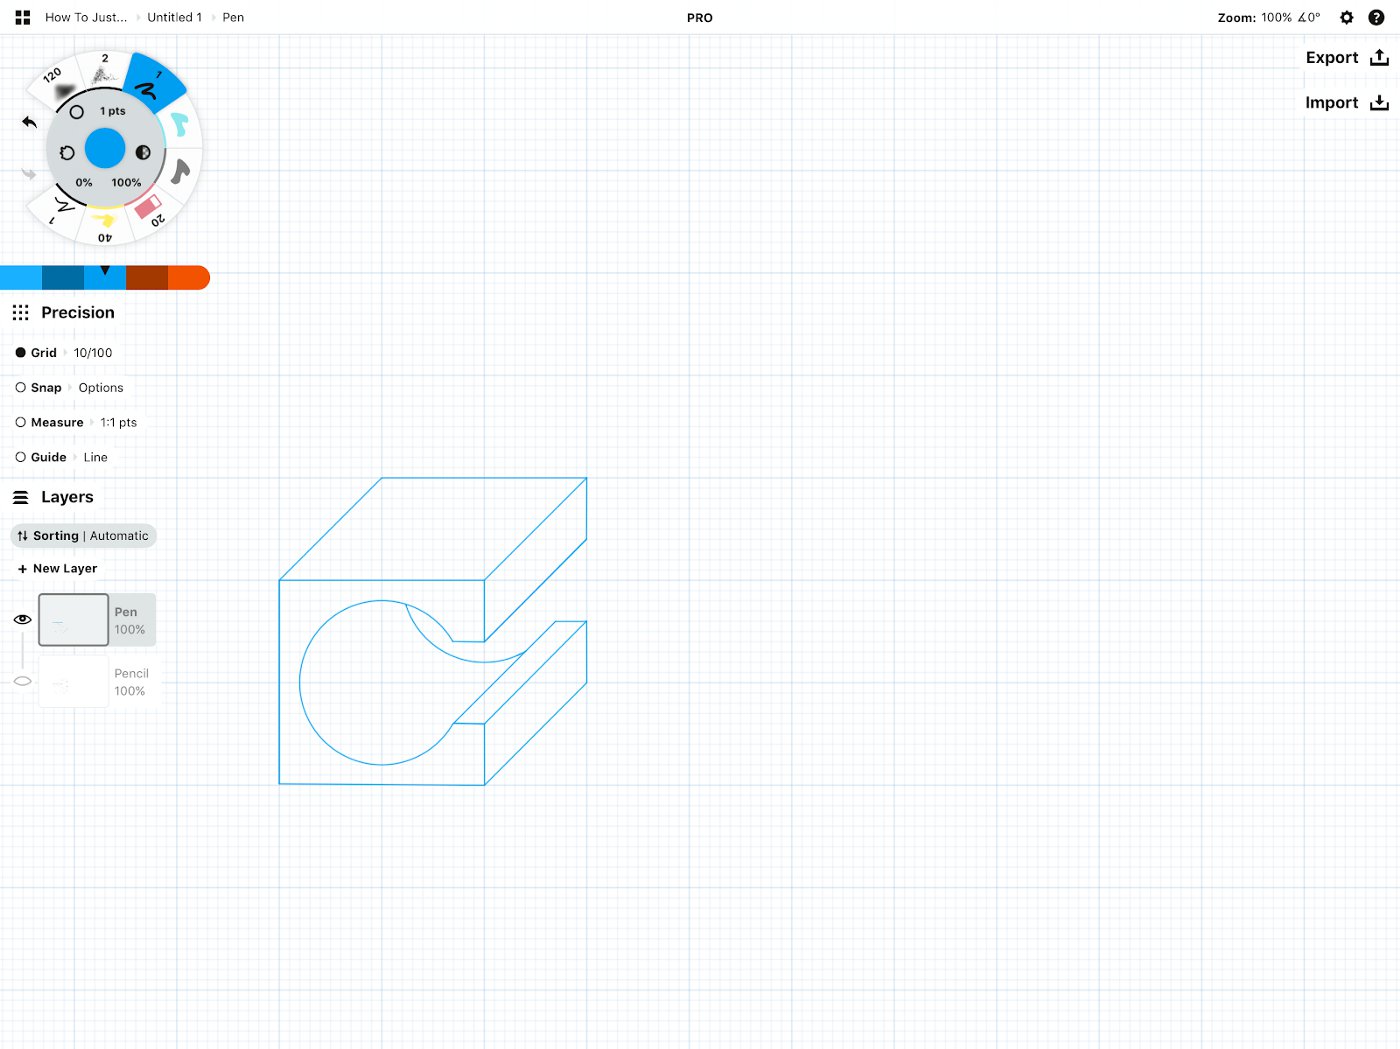
Once you're finished inking, hide the pencil layer by tapping the eye. Check out your design.
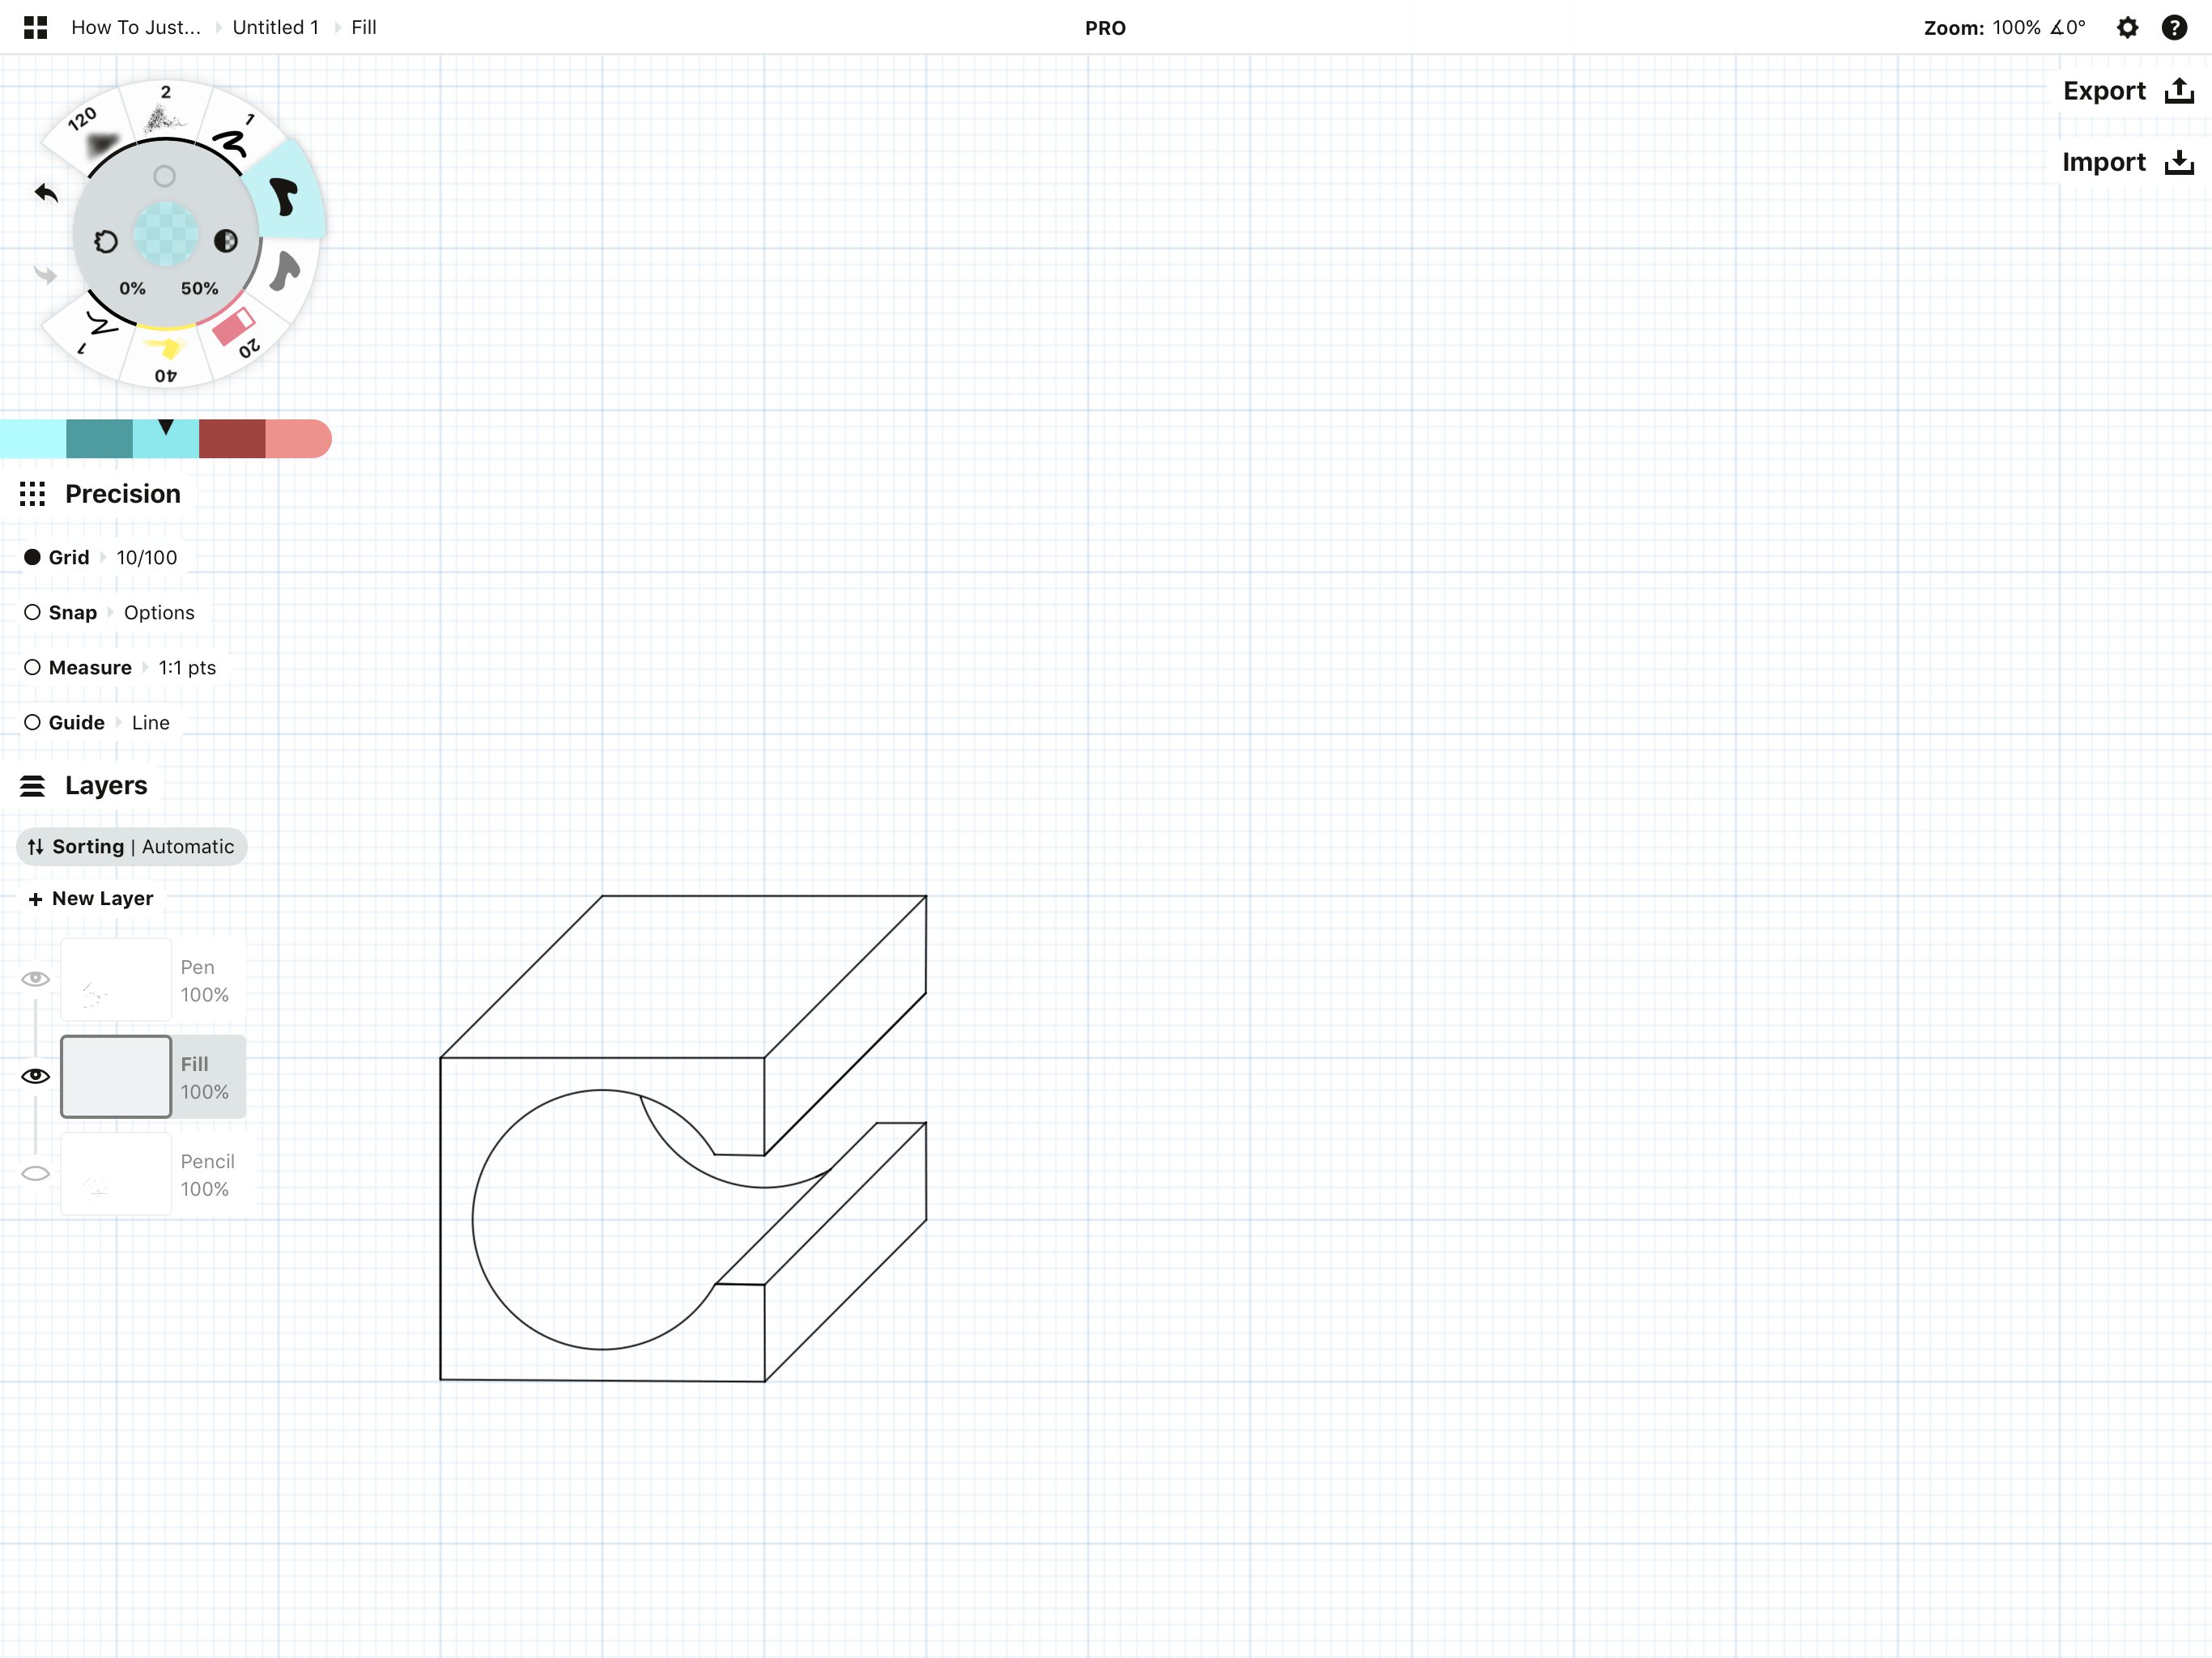
Rendering the Design
Finally, let's render this design into an object of beauty.
1. Select everything you've drawn with the Lasso.

Now tap the center of your tool wheel to bring up the color wheel and change the ink to black.

2. Choose the Filled Stroke tool. In the Layers menu, tap+hold the Fill layer to select it, and drag it downward so it's sitting right below the ink layer.
Fill in your shape. The Filled Stroke tool follows your finger or stylus tip and fills any positive space you leave between your start and end points, tracing your path.
We don't have a traditional bucket fill yet, as adjusting among movable vectors can get tricky, but we're working on it. If you go outside the lines, use the Slice tool to clean up the edges. To mask perfect lines, combine the hard eraser with the Shape Guides.
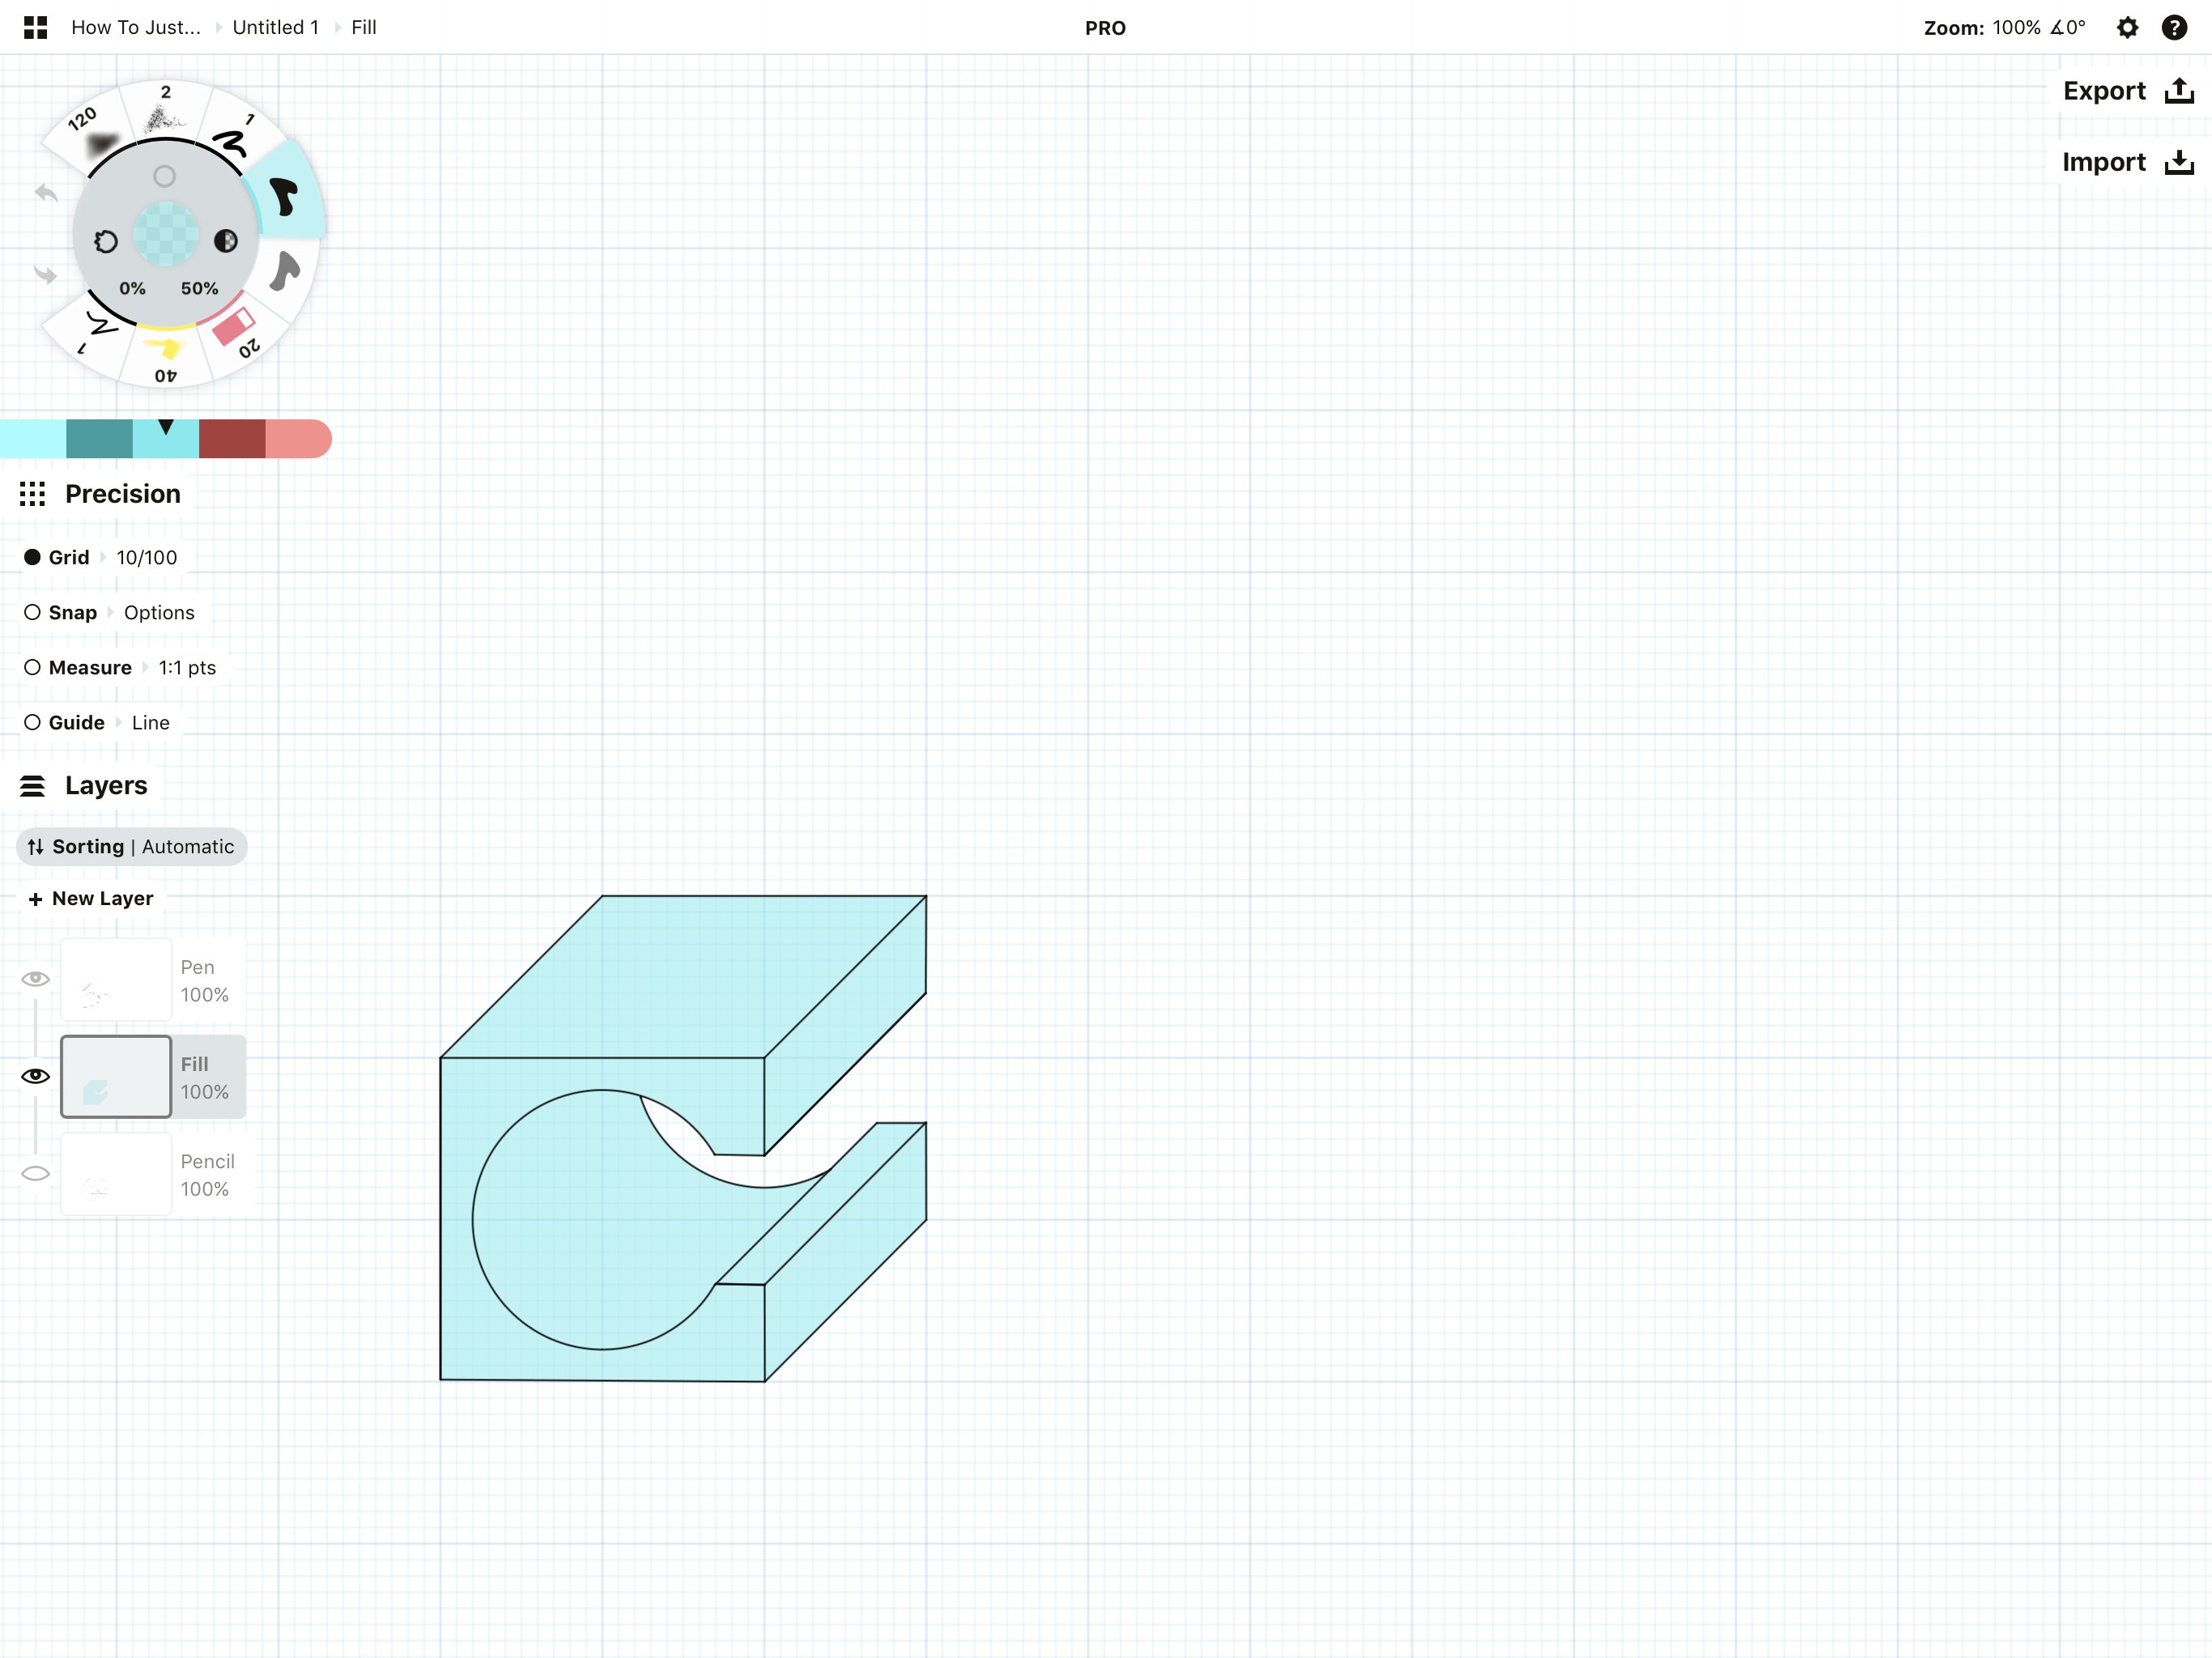
3. Add a shadow to the inside of the circle using the Filled Stroke tool in a low-opacity ~10% black. Draw right over the blue fill. Or create a second Fill layer and draw your shadow there.
That's everything! The design is ready for measurements and prototyping. Dreaming of some color options that will be available…
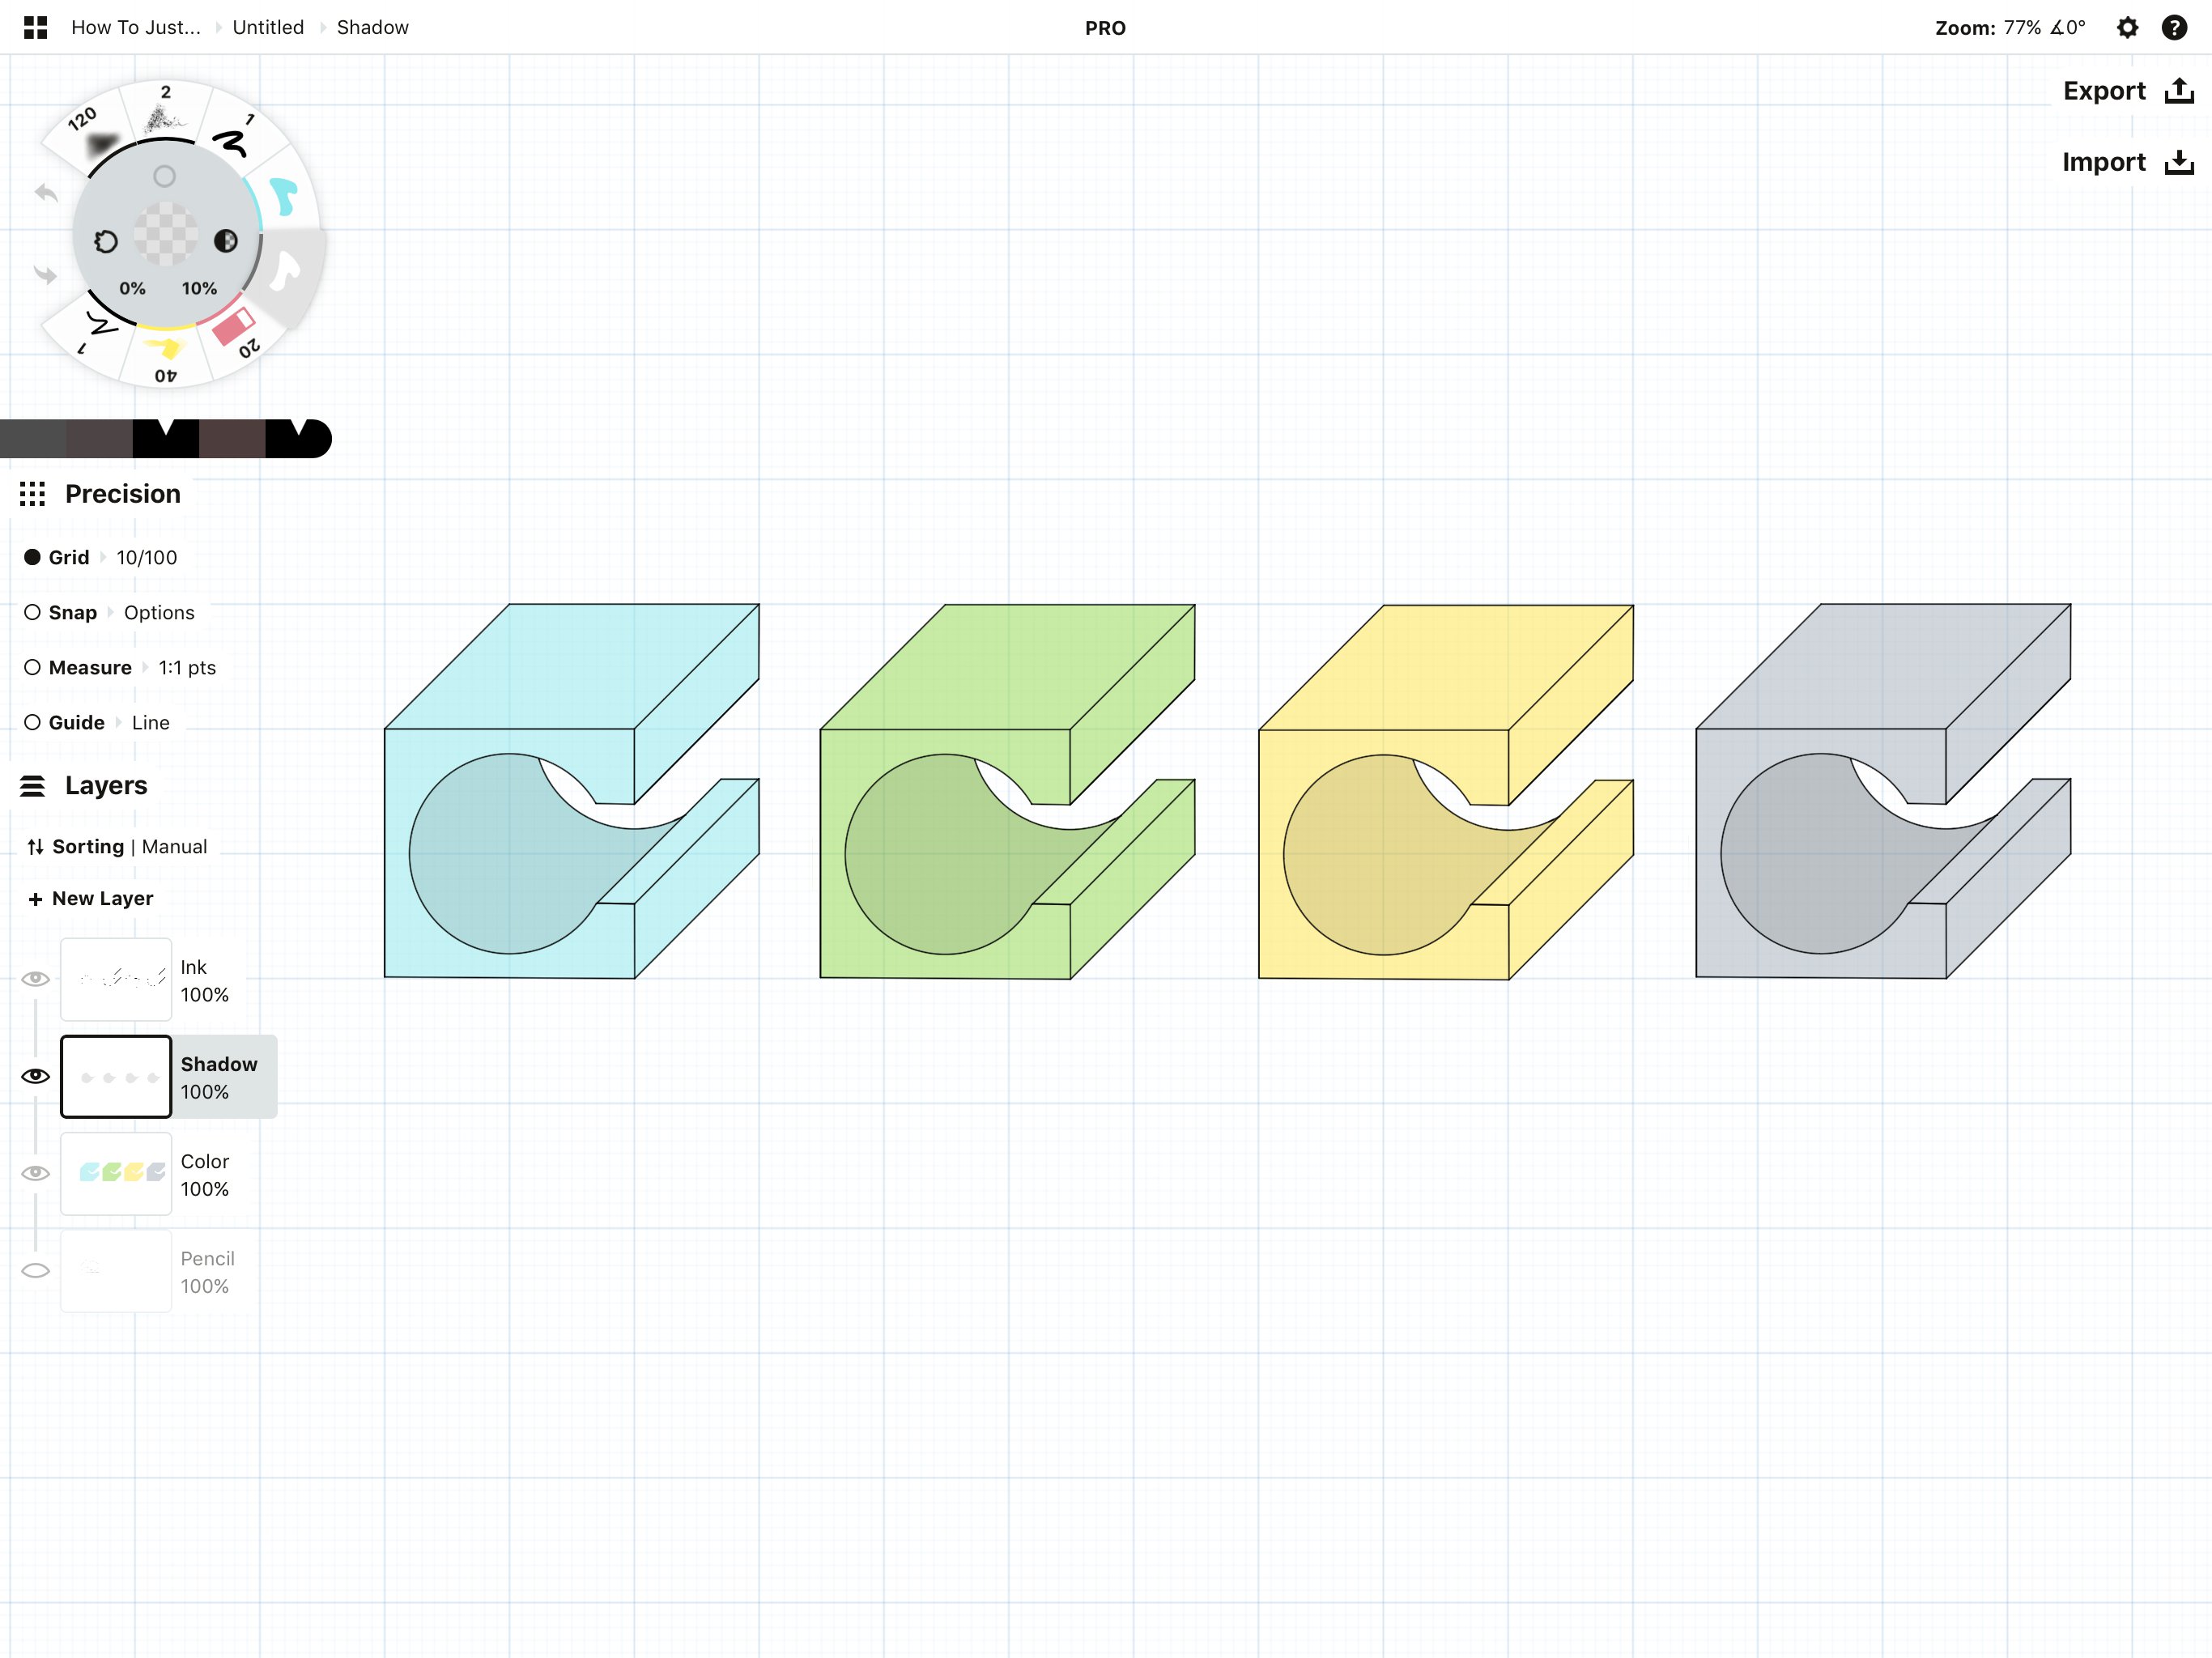
Do you know the trick here? Select the entire object in All layers via the Selection menu at the bottom of the screen, and duplicate it. Then select and change the copy's fill to a new color.
. . . and perhaps a logo.
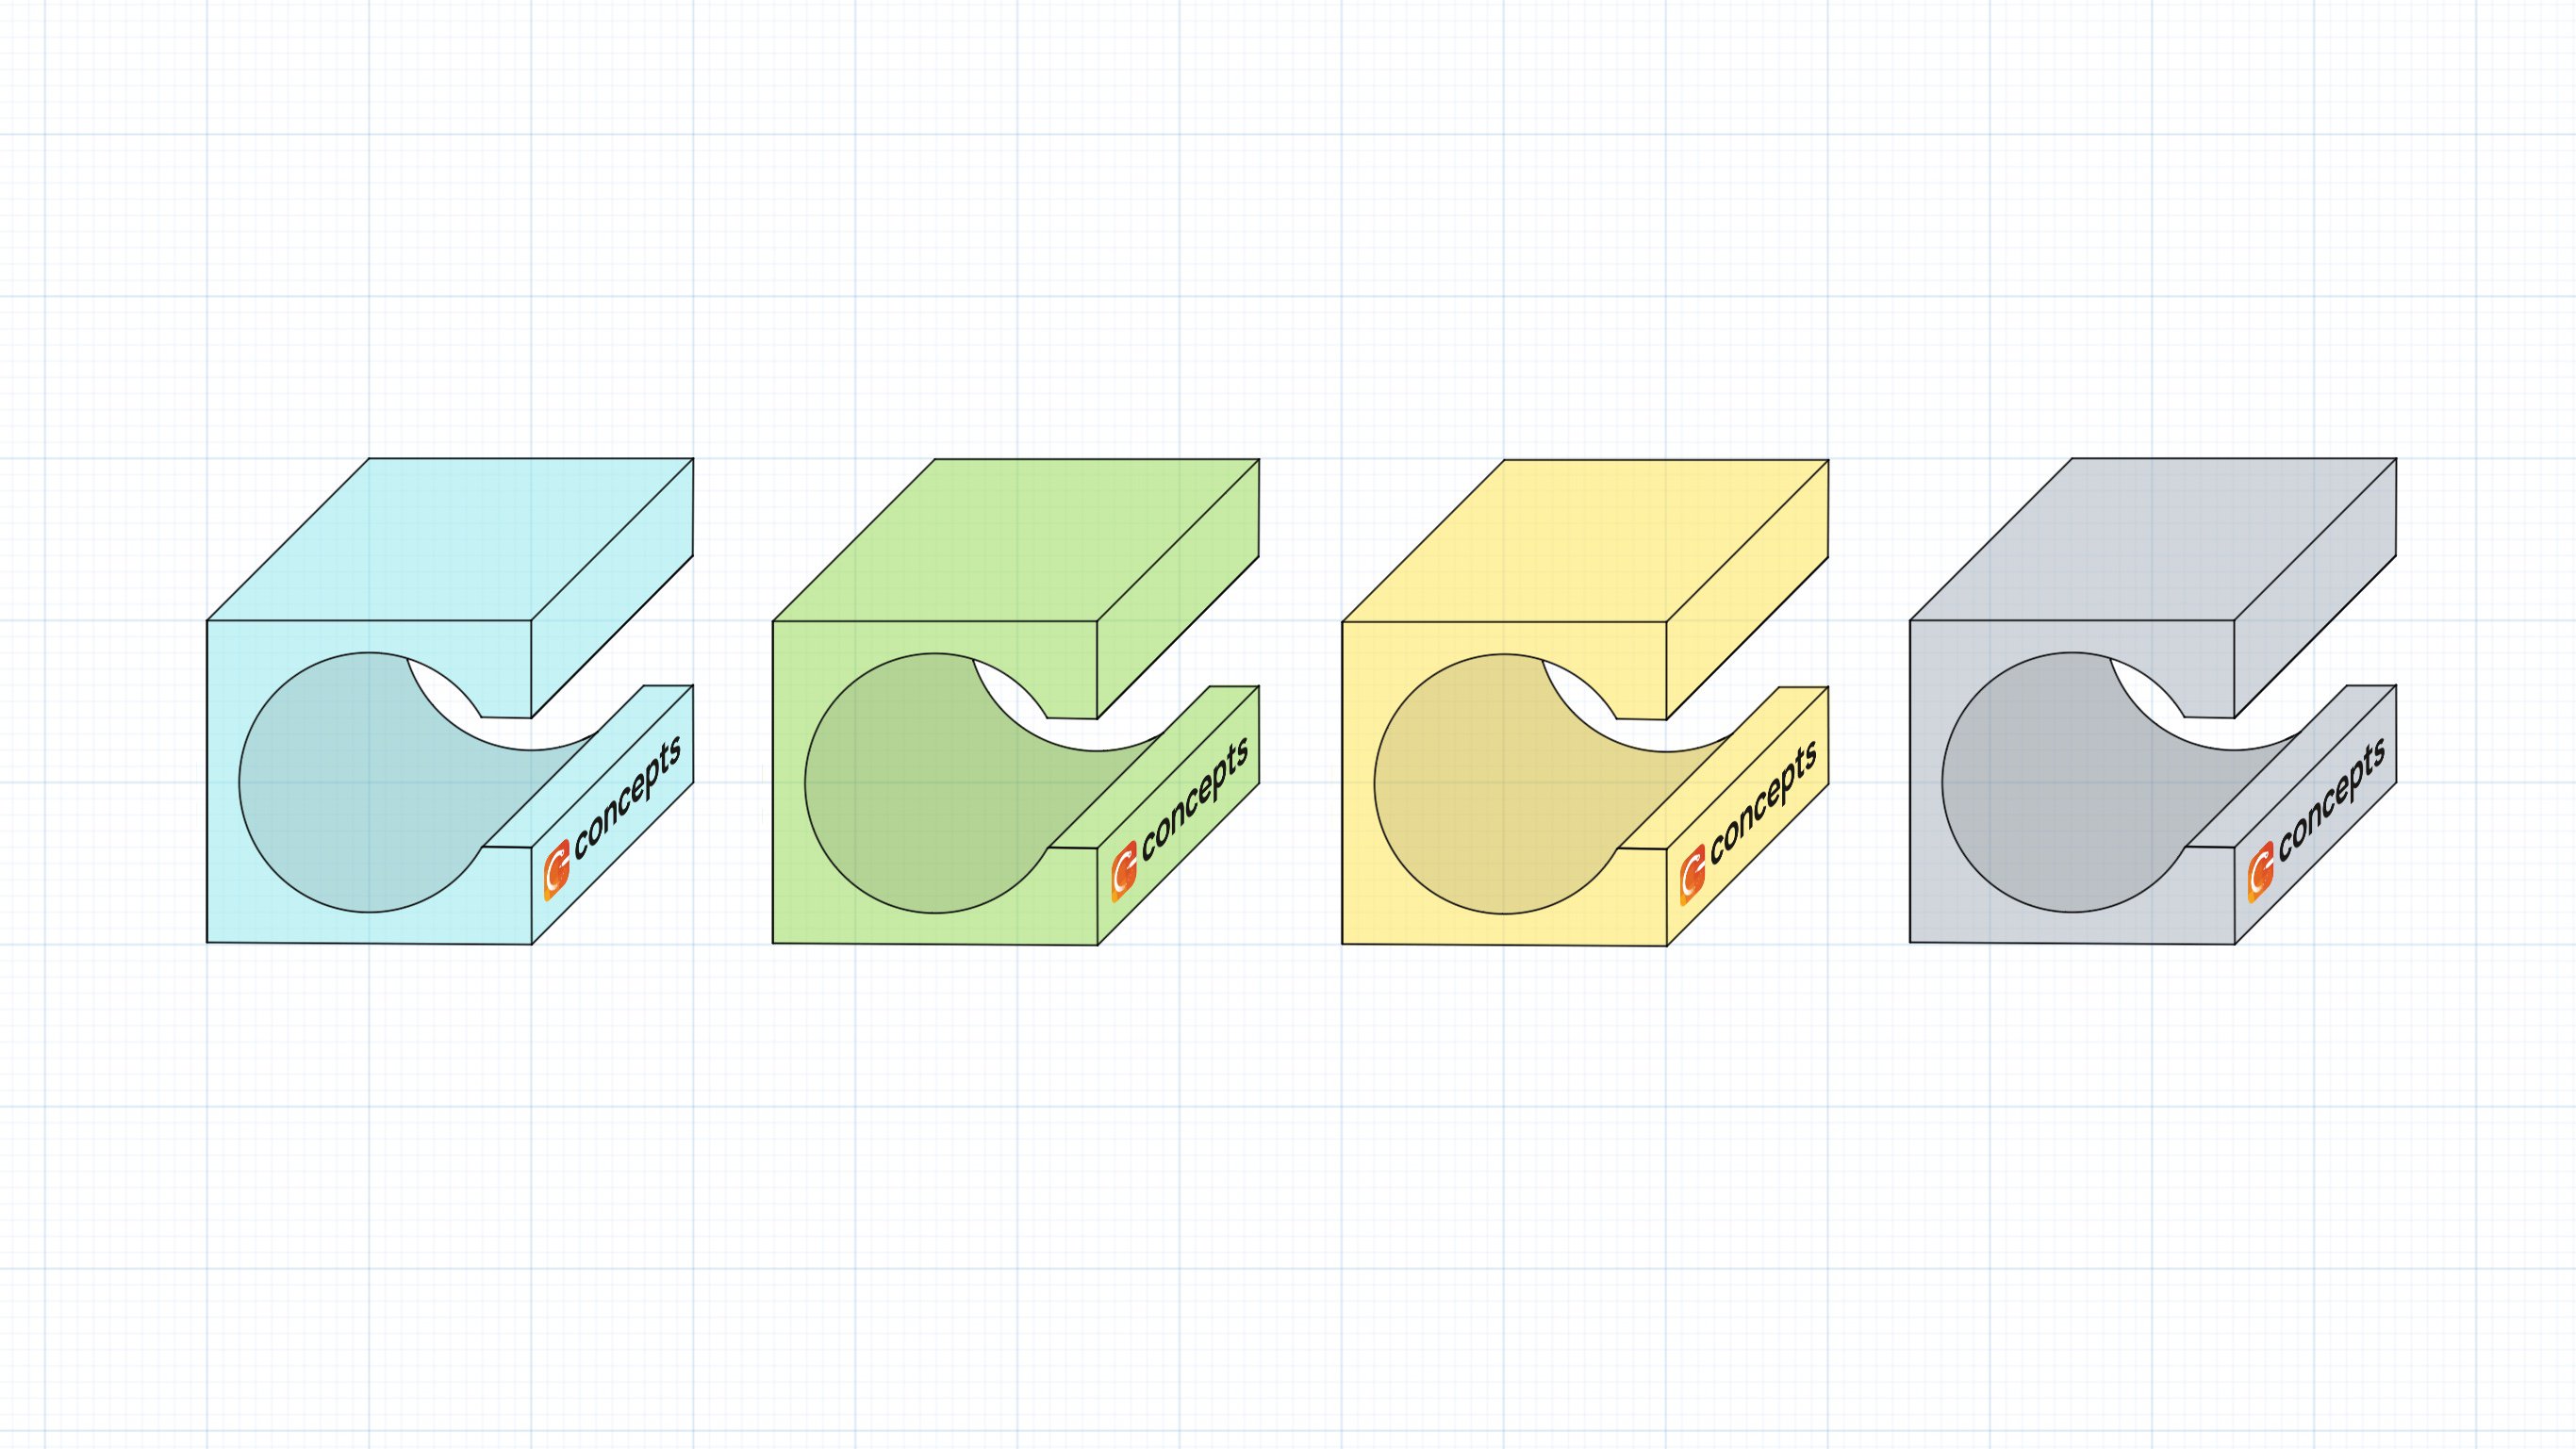
Import a logo with a transparent background and use the control points as described in the Selection tutorial to line it up with your sketch.
This little object has a future… at least as a design tutorial. Good luck with your designs!
If you have any questions about using the Shape Guides, Snap, Selection or Layers, please email us at concepts@tophatch.com, or chat with us in-app via Help -> Ask Us Anything. We'll be happy to help.
By Erica Christensen
Recommended
Scale and Measurement in Concepts
How to Design a Floor Plan
How to Make Icons
Concepts App For Designing My Knitting
Source: https://concepts.app/en/tutorials/how-design-concepts/
Posted by: rubiohadvaid.blogspot.com
0 Response to "Concepts App For Designing My Knitting"
Post a Comment